Henry's Homemade Formula

Our journey towards adding "real" foods into Henry's Homemade Blended G-Tube Formula

Feeding Tube Awareness Week 2022 – Tuesday: Nutrition

Tuesday, February 8th
There are long-term consequences to malnutrition and being undernourished. For some people, there wouldn’t be life without tube feeding, but for others they would continually struggle with malnutrition. Tube feeding makes it possible for people who aren’t able to eat enough on their own to get the nutrition they need to live.

Henry’s food button keeps him alive. It’s as simple as that. When he was younger I used to question myself constantly… should we have gotten his tube? Would he have eaten on his own eventually? Did we make it so he doesn’t eat? These questions and more would loop through my mind on a continuous feed, sometimes in the front of my mind, other times as a lurking niggle hiding in the background. But always there.

Now it’s easy for me to say – no food button = no Henry. I’m not meaning to sound dramatic (although I question writing it as it sounds dramatic to me). For me, it’s one of those “simple… not easy” statements. A few decades ago, when feeding tubes weren’t so common, and certainly weren’t common outside of a hospital setting, our lives would have looked very different.

It goes without saying we are thankful for his feeding tube.  If you didn’t know us and you saw the kids playing at the park… other than perhaps noticing that he looks a little different running, you probably wouldn’t take a second look. His food button is a big part of what enables him to grow and thrive.

I won’t lie – I have moments where I feel completely overwhelmed.  Those moments are fewer and farther between than they used to be. And now there more likely to be about his tween-ness, than his feeding tube.

For Henry we (read “I”) chose to do a homemade blenderized diet.  When we first started all this I hated feeding him formula from a can.  It either looked like a chocolate milk shake or powdered sugar, depending on the brand. It didn’t seem like “real” food to me.  That’s a judgement, I know that, and it speaks more to my feelings of inadequacy than to the nutritional content of commercial tube feeding formulas.  I couldn’t even feed my own baby… and that really triggered me.  I made it mean there was something wrong with me; I clearly wasn’t good enough; and there would never be enough I could do to make up for it. These thoughts still live inside me, and thanks to the help of brilliant therapists, I’m better noticing and reality checking them when they take up too much space.

We continued with homemade blended meals because it turned out that Henry has several food sensitivities that made typical commercial formulas not work for him.  It was a game changer when we started blending his meals.  It was almost 11 years ago and I still remember the difference clearly.  He went from meals that took at least 45 minutes, frequent vomiting and us walking on eggshells, to thriving, eating more and feeling better.  We no longer struggle so much with the “what” and “how much” of his meals. Sometimes he eats too much and gets a tummy ache, but gone are (most) of my anxieties around him not eating enough. “The Homemade Blended Formula Handbook” by Marsha Dunn Klein, was a HUGE resource, and continues to be my number one recommendation for people wanting help getting started.

Trusting and consent around his body are big ideas we are working with currently. Years of holding him down, against his will, “for his own good”, listening to him scream as we changed his food button or other such intervention, has left a lasting impact on his trust and feelings of body autonomy. Now we talk. And talk. And talk some more. Now it may take 8 months to change his food button that’s meant to be changed every 3 months. But it’s his call. It’s his determination, stubbornness, tenacity and will that decides when and how things get done. It’s not easy… for any of us. It’s a radical shift in how things used to be, and it pushes us all to our perceived limits at times. And it works, because we all grow a little more each time we navigate it together.

What I do know is that thanks to his feeding tube Henry eats WAY more nutritionally balanced meals than my other son (9 years old… processed meat & raw veggies please!).  Henry’s meals provide the nutrition he needs to thrive… and that’s all this mama can ask for!

Leave a comment »

Feeding Tube Awareness Week 2022 – Monday: Awareness

It’s that time of year again… Feeding Tube Awareness Week! Each year during this week, I share our story to raise awareness about feeding tubes and how they have changed our lives. It’s also a beautiful time for me to reflect back on where we’ve been. We have changed a lot over the year – as a family and as individuals. But what hasn’t changed is our gratitude for, and reliance on, this life saving piece of medical technology that allows our son to eat, grow and thrive!

Henry, age 1
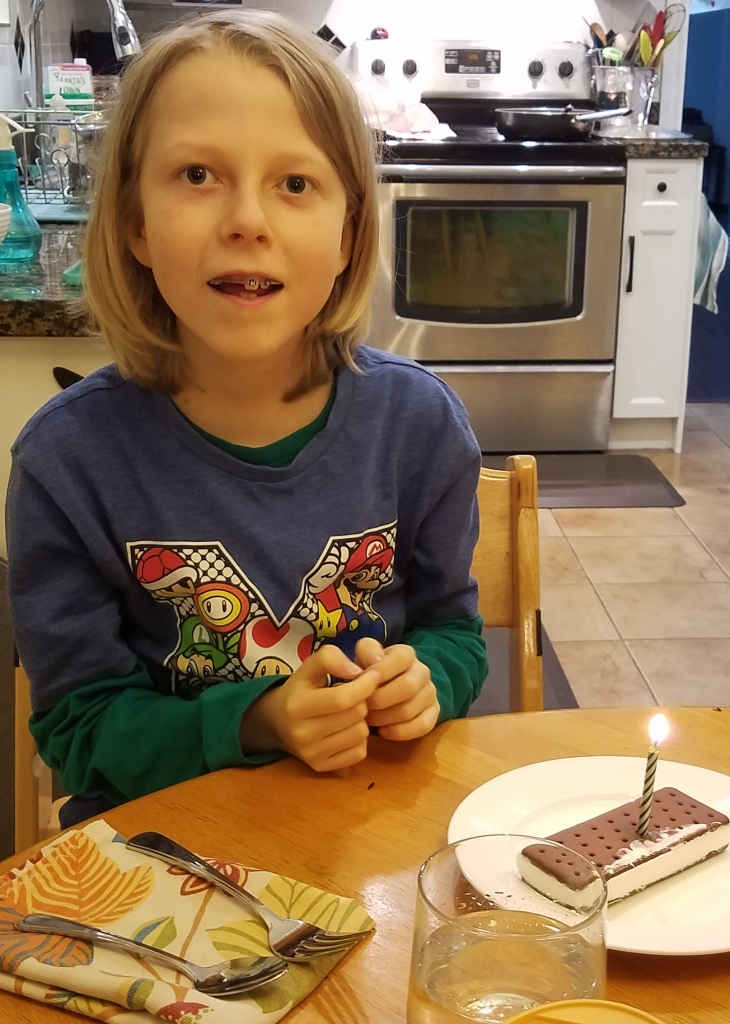
Henry, age 11

Awareness
Monday, February 7th

Share information about why you or your child is tube fed. There are hundreds of medical conditions that can lead to tube feeding – most of which you can’t see. Most people do not understand why someone, particularly children, can’t eat enough to grow, thrive and live. Help educate people about the medical conditions that can lead to tube feeding.

Henry was born with a congenital myopathy – a muscle condition – that results in low tone, or weaker muscles.  Despite years of testing, his condition remains undiagnosed.  We know a lot about what he does not have, but we do not know exactly what his condition is.  What we do know is that it is appears to be a genetic condition, but its origin is not in one of the “common” genetic sequences.  Having said that, we are told there are thousands of obscure genetic conditions.  In the last couple years we thought we were narrowing in on a diagnosis – the genetic sequencing showed a specific “blip” that seemed promising. However a muscle biopsy was “non specific”, so we’re back to where we started. It may be we never know the exact cause, however new information is being discovered all the time, so we never know.

Because Henry’s condition is undiagnosed, it also means there was no “road map” to follow – no other cases to glean information from about what to expect.  As with all things, there are pros and cons to this – no precedents meant no idea what to expect.  But it also meant no preconceived ideas of what he might, or might not, be able to accomplish.  So as far as we’re concerned… the sky’s the limit :).

When Henry was born, he was a very quiet little guy.  He did not move, did not cry, did not fuss.  He couldn’t – his muscles were too weak to.  Seeing him now, he’s an active, outgoing boy.  His muscles are still weaker than his peers (and they likely will always be), but with some accommodations he can participate in and enjoy most of the same activities as his classmates.

Henry continues to eat exclusively through his food button (a mic-key brand, low profile gastronomy tube).  Because we make his food ourselves, he may very well be one of the best-fed almost 12 year old boys we know…

…broccoli, asparagus, kale, carrots and broiled chicken for breakfast anyone…?!?

That’s not to say he doesn’t eat chicken nuggets, and chocolate cake from time to time as well.  We used to follow a well planned, documented, calculated food guide when making his food. His doctors and my anxiety required the certainty of accurately measured nutrient counts. Now he gets a little of this and a little of that, with a few left overs thrown in :). It’s not as haphazard as it may seem (I can feel my anxiety rising even typing this!). It’s more than I’ve been making his food for so long now that I think I could do it in my sleep. I can rough measure proteins, fruits & veggies, carbs, dairy substitutes, fats, supplements, etc while making the rest of our dinner, and somehow it turns out okay every time.  

He continues to taste foods by mouth, the current favourites being chocolate or mint chocolate ice cream.  He eats very little by mouth these days, and we are less and less concerned by this. I think one of the best things we did was stop his occupational and feeding therapy several years ago. He got to just be a kid, and we all got to relax a bit.

While his “swallow” muscles have strengthened over the years, it is physically impossible for him to bite, chew and swallow a sandwich, for example.  His swallow is not strong enough to clear his mouth and push the food all the way down to his stomach.  The resulting “pooling” that remains in the upper throat area puts him at risk of aspiration (breathing in food/liquid).  However as he has had dozens of chest x-rays over the years and has shown no signs of aspiration, he has the go ahead to continue exploring foods by mouth, in a way that makes sense for him. When or if he shows interest in restarting, then we’ll discuss it as a family. Until then, he’s old enough that we follow his lead. It’s now him who’s in the lead, with us and his doctors in the supporting roles.

Henry received his first feeding tube at 2 month of age – a nasal-gastronomy tube (or ng tube).  This type does not request surgery, but is highly invasive in that it goes through the nose, down the back of the throat and into the stomach.  Just after his 1st birthday, Henry had surgery to receive his g-tube.  Almost 12 years later he still has his food button and we are so happy he’s getting the nutrition he needs to be a happy, healthy tween!

Cheers, Shelley

Leave a comment »

Feeding Tube Awareness Week 2020 – Tuesday’s Topic: Nutrition

There are long-term consequences to malnutrition and being undernourished. For some people, there wouldn’t be life without tube feeding, but for others they would continually struggle with malnutrition. Tube feeding makes it possible for people who aren’t able to eat enough on their own to get the nutrition they need to live.

Henry eats exclusively through his food button.  All his nutrition is received through his tube and without it he very likely would not be alive today.  So it goes without saying we are so thankful for his feeding tube.  But I won’t lie – we have moments where I feel completely overwhelmed.  Those moments are fewer and farther between than they used to be.

For Henry we (read “I”) chose to do a homemade blenderized diet.  When we first started all this I hated feeding him formula from a can.  It didn’t seem like “real” food to me.  That’s a judgement, I know that, and speaks more to my feelings of inadequacy than to the nutritional content of commercial tube feeding formulas.  I couldn’t even feed my own baby… and that really triggered me.  Perhaps if we’d had a diagnosis I would have felt differently, but that’s hypothetical and I try to stay away from “what if’s”.

We continued with homemade blended meals because it turned out that Henry has several food sensitivities that made typical commercial formulas not work for him.  It was a game changer when we started blending his meals.  It was almost 8.5 years ago and I still remember the difference clearly.  He went from meals that took at least 45 minutes, frequent vomiting and us walking on eggshells, to thriving, eating more and feeling better.  We still struggle with “what” and “how much”… but as Henry gets older and plays a more active role, we are working on a new dynamic.  Trusting and consent around his body are big ideas we are working with currently.

What I do know is that thanks to his feeding tube Henry eats WAY more nutritionally balanced meals than my other son (7 years old… processed meat & raw veggies please!).  Henry’s meals provide the nutrition he needs to thrive… and that’s all this mama can ask for!


Leave a comment »

Preparing Henry’s food… a photo journal (Part 1)

As I was making Henry’s food last time, I thought I would take some photos along the way.  When I first started researching homemade blended foods it was other family’s blogs that provided the best source of information – and the photos really helped.  So… in the spirit of good karma and passing along the kindness… I thought I would do the same.

To start with, here’s a photo of all the ingredients.  In reality, I’m not usually this organized and usually pull things out of the fridge as I go.   I tend to make single batches, and often will make Henry’s food as I am making our dinner.  Many families prefer making larger batches to store either in the fridge or freezer.  While I have made larger batches myself, I find it just as easy to make it daily, and this also allows me to know exactly what he is eating in case he starts getting sick.  We’re pretty good at knowing which foods Henry tolerates and digests  best, but I’m not 100% confident yet.  I will sometimes do 2 batches up… just to give myself a day off :).

In general is takes about 20 minutes from start to finish, assuming that the “based” items are pre-made.  These include things like rice, quinoa, chickpeas, boiled eggs, etc.  For these items I will generally cook 3-4 days worth and store in ziplock containers in the fridge.

Today’s menu for Henry’s food includes:

  • Grains: 1/2 cup quinoa & 1/2 cup wild rice;
  • Fruits: 1/2 cup frozen peaches (thawed) & 1 medium tomato;
  • Veggies: 1/2 cup raw broccoli, 1/2 cup left over boiled potato & some left over steamed beet greens that needed to be used up;
  • 1 cup rice milk;
  • 2 ounces left over chicken
  • 3 tbls Sunflower oil
  • 2 tbls molasses
  • 1 coenzyme Q10 tablet

For the grains, I will cook up larger quantities and store them in the fridge or freezer.  I tend to do a few days worth at a time, as this can be a time consuming step.  It’s not hard… I just need to be organized and remember to do it (which I don’t always!).

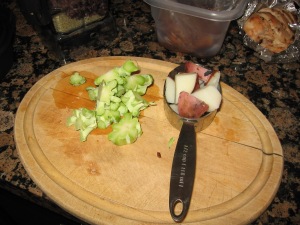
For the fruits & veggies, I don’t tend to cook the items, unless they are especially “hard” when raw (like yams or beets).  The food gets blended for so long in the Vitamix that they are cooked by the time it’s done anyways.  I will roughly chop into chunks, but don’t worry about getting things a certain size… let the blender do the work.


Today I used 2 ounces of chicken, as we have leftovers from a family dinner on the weekend.  I purchased a kitchen scale earlier this year for this purpose as I had no idea how much an ounce “weighs”!  I bought a nutritional scale that could tell me all sorts of fun (aka useless) facts about the things I am weighing, but don’t use that functionality at all!  All I really needed was a simple scale, but I didn’t know it at the time.  I no longer do a daily spread sheet for each menu, but even when I did, I used the information from the Nutrient Database (see Helpful Websites on sidebar) not the pre-programmed information from the scale’s database.


Next up comes the rice milk.  The Homemade Blended Formula Handbook says to put the liquid in first, but I’ve found that most times this isn’t necessary.  If you’re using something very thick that is hard to permeate, like oatmeal, then putting liquid in first is important.  But as long as you’re using foods where liquid can seep down to the bottom, then the order the items are placed isn’t that important.

For me, what is more important is putting any hard to blend items in first so they are closer to the blades.  I find if I put things like rice in last, then I get pieces floating on the top of the blender and it’s harder to push it down into the blades.  Peas are another one… must be close to the blades or the pea skins separate and don’t get blended enough.

The other liquid items are the oil and molasses.  Some people have asked if the oil seperates out of the food as it is stored, but I’ve never had a problem with this.  When I froze Henry’s food, this happened once, but it was easily whisked back in after reheating.

I do need to ensure the molasses is poured into the centre of the container, not down the side, as it sticks to the container’s sides and is hard to get off while blending.


The final item is one 30 mg Coenzyme Q10 tablet, as recommended by Dr Bratt.  This was recommended for improving muscle function and was recommended specifically for Henry based on his low tone (any medication or supplements would need to be specific for your child’s needs).

The tablet dissolves completely and we’ve never had any problem adding it into the food.  Some medications cannot be blended into the food, but must be given separately orally or through the g-tube.  Henry also gets 1000 IU Vitamin D, and this goes directly into his tube each day.  Again, the 1000 IU dose was recommended specifically for Henry by his neurologist, and should not be given to other children unless by medical recommendation.


Once all the items are in the blender, I put on the lid and insert the tapper.  It usually takes several minutes to blend the food, depending on what foods I’ve used that day.

For more information about the next steps – measuring, jarring, and storing the food – see Part 2 of the photo journal.

Cheers, Shelley

3 Comments »

Preparing Henry’s food… a photo journal (Part 2)

This second installment focuses on what happens after Henry’s food is already blended.  If you’d like to see photos of what goes into the food, check out “Part 1” and/or some of the sites on my blogroll – they’re also a great source of information.

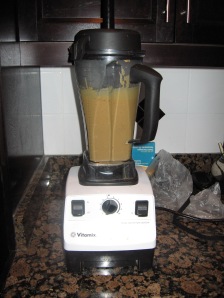
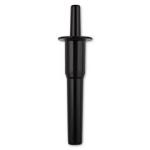
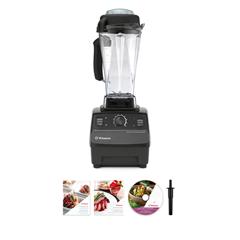
Here is Henry’s food, already blended in the Vitamix blender.  The tall thing sticking out the top is the tamper – it is what is used to push the food down into the blades to ensure everything gets blended evenly and completely smooth.  Here is a picture (from the Vitamix website) of what the tamper looks like:  
The tamper is also used to draw the foods down from the top of the container into the blades – by pressing it into each corner and holding it there, a suction is created from the top down.

It usually takes anywhere from 4-10 minutes to get the food to the desired consistency – slightly thinner than cake batter.  More importantly, completely smooth with no lumps, grit, or fibrous pieces.  The timing depends entirely on what food are included that day… harder foods, larger chucks and more fibrous foods take considerably longer to blend.


Each batch of Henry’s current menu makes about 5 – 200 ml jars… sometimes a little more, sometimes a little less – again it just depends on the foods used.  Henry used to have more each meal – closer to 240 ml, but he started throwing up again so we cut it back. I think he may have been in a growth spurt before as he just doesn’t seem as hungry now.  We’re constantly adjusting this amount.

I put a little oil on the rubber end of the 60 ml syringe to help is slide easier.  Without the oil it is extremely hard to suck the food into the syringe.  Plus, the more times the syringe is used, the harder it gets.  Our funding provides 2 syringes each week, but I tend to use one longer – as long as it is washed well and pulled apart to dry, each syringe can be used for 1-2 weeks at least.  You can tell when it’s time to change – the rubber tip has expanded so much it will no long fit inside the other part.  Even with the funding… I like to use things as long as I can… all the waste adds up.


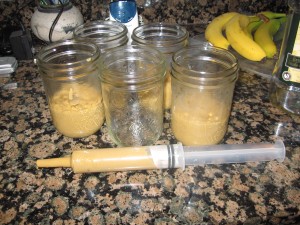
Here you can see the syringe filled with food.  Once once jar is filled with the right amount, I will sometimes “eyeball it” and free pour the remaining food.  But frankly, it’s just as fast and probably easier to keep using the syringe.

Right now I’m using 500 ml jars – so they’re not even 1/2 full.  But the old 250 ml jars didn’t leave enough space for whisking the food once reheated.  I bought some plastic lids for the mason jars, so I don’t have to use the canning lids.  I like mason jars as they can go in the freezer, fridge and microwave.  We’ve broken one (in a spectacular slide off the counter, bounce off the chair and crash into the wall!) which sent glass and food across the entire room… but other than that – they’ve worked well.  I reconsider using plastic every once in a while, but I don’t want to microwave it… so stick with the glass jars.

I like the wide-mouth mason jars as the flat sides make it easier to get the food out.  I also have some 500 ml regular mouth jars that I’ll use in a pinch, but it’s much easier to get the food into Henry’s feeding bag.


Here they are, all finished and in the fridge.  The 500 ml jars take up considerably more room than the old 250 ml ones, so they share the top shelf with the egg cartons :).

Once cooled, the food thickens quite a bit, so prior to heating up we add more liquid – usually rice milk, juice or water.

The whole process usually takes about 30 minutes.  I tend to make up the food and put it in the Vitamix container at the same time as I’m making dinner.  Then it sits in the fridge until after dinner and I blend it while Henry is upstairs having his bath.  (My usual pet-peeve… the Vitamix is too loud!)


If you have any questions, or would like more information about making homemade blended food, please feel free to leave me a comment!

Cheers, Shelley

2 Comments »

Preparing Henry’s food: a photo journal (Part 3 – feeding Henry)

The final step in preparing Henry’s food is getting ready to feed him.  This has been on my mind recently as my mom was staying with us and she looked after Henry for the day, for the first time.  She was very excited, but also nervous, as this was the first time she would be feeding him on her own.  My mom is from out of town, so while she doesn’t see Henry as often, when she comes she tends to stay longer than our other family.  She had already spent time learning the various steps involved, meaning that Shawn & I were also paying more attention to what exactly we did, so that we could be consistent when showing her.  It got me thinking about how far we’ve come and how much we’ve learned in the past year and a half!

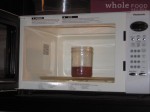
The first step is to prepare the food.  As it is usually coming straight from the fridge, it needs to be reheated – we microwave it for 25 seconds.  We’ll usually add a small amount of liquid – juice, rice milk ,water – to ensure the top of the food doesn’t get overcooked and harden.   The goal isn’t to heat the food a lot, just bring it back to room temperature.  While he has eaten cold food, we try to avoid it if possible as too cold food straight into a g-tube can cause stomach upset and diarrhea.  Henry doesn’t warm up his food by chewing it, so we warm it up for him.  There have been times, usually when traveling, that we’ve been unable to warm it, and so far there hasn’t been a problem.


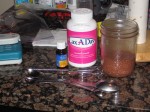
Next up the food is whisked well.  This is to ensure there are no hot spots from the microwave and to remix the food, as it thickens in the fridge.  At breakfast time we add in 1.5 tsp of PEG into his food, and 1 drop of D-drop Vitamin D supplement directly into the extension tube.


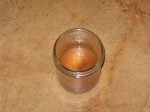
Here’s a picture of his food, ready to be put into the food bag.


Here’s the fancy one-handed move I do so that I can hold both the jar and the food bag with one hand, and use a spatula to scrape the remaining food out of the jar.  Pretty impressive huh?!?


Here’s our clever “hanger”… aka… the paper towel roll holder!  But seriously, it works great, the spacing is perfect between the food bag and the pump and it’s much better than using a hospital pole clamp!  Although I saw a banana hanger the other week with a really sturdy base so I may go back and buy it.


Next up we prime the tubing of the food bag.  The pump has a button to prime the tube, and if you closely you can see food is partially the way along the tube.  We always prime the tube to remove the air – we don’t want all that air going into Henry’s tummy.  Now realistically, the entire tube only hold about 11 mls, so it’s not a huge amount, but we still don’t want it in his tummy.


Now that the food bag is ready to go, we prime Henry’s extension tube, again to remove the air.  We use a 30 ml syringe for this.


Then the extension tube is attached to Henry’s button.  This photo was taken at breakfast, so Henry was wearing his p.j.’s.  When he has a t-shirt on, the tube just comes out the bottom of his shirt.  We then flush the tube with 15 mls of water.  This is to wash through any debris that may be in the tube or his button and helps to prevent clogs.  It also provides some extra water.  The amount of water used depends on the person… the bigger the person the more water (usually).  Just like an adult has a bigger drink of water than a child does.


Now it’s time to attach the tubing from the food bag to the extension tube.  Henry’s helping put the “red” thing in (the red part is the end of the food bag tubing).


And here we are all done.  Henry & I are having a breakfast picnic this morning, sharing a bowl of cereal and some juice (the trains eventually end up in the juice and some of the milk on the floor!).  We try to also have some foods available for mouth eating at the same time as Henry is eating from his food bag.  It doesn’t always work out that way… but that’s our attempt anyways :).


After Henry is done eating, everything gets cleaned with hot water.  We rinse the bag out several times under the tap and then fill it completely with hot water (500 mls).  It then gets hung from our kitchen cupboard handle and the water is drained through the tubing to rinse it clean.  We use a plastic cloths pin to squeeze the tube in just the right spot and this lets the water free-flow through without having to stand and hold it ourselves (thanks to our night nurses last year for this tip! Must use a plastic cloths pin, not wood, or else the rubber tubing gets ripped).


While the extension tube is still attached, we flush it with another 15-20 mls of water to push the remaining food through and rinse out his button.  Then the syringe and extension tube are also washed with hot water and left open to dry.

Well… that brings to a close this series of posts on preparing Henry’s food.  I hope it helps explain the steps involved and, more importantly, shows that homemade blended food isn’t that hard.

I recognize that for some families… life is just so overwhelming that the idea of making blenderized meals is way too much.  But with some practice and organization, it has become just another part of our daily routine.

As always, if you have any questions, or comments, feel free to contact me.

Cheers, Shelley

1 Comment »

Food you could build your house with… what was I thinking?!?

Ok… I’ll admit it… I was in a rush, totally not paying much attention to what I was doing and semi-randomly tossing foods into the blender. So it’s no wonder Henry’s food ended up looking like this…

No joking… it took me a few minutes to take the photos – I took 5 in all – and the food never moved!

The culprits are clear: yams, white rice, banana, oatmeal and chickpeas all mixed together.  Seriously, you could cement a roof with this stuff!  And while, upon reflection, it’s really quite funny… in actuality it’s no laughing matter.

The problem with food this thick, is that we have to add so much liquid to thin it down so it flows through Henry’s feeding tube, that the nutrition gets diluted.  What should have been one day’s worth of food – 5 meals – ended up closer to 8.  So all those wonderful vitamins, minerals and other good stuff that should have been packed into one day, lost their nutritional punch, so to speak.

Now, don’t get me wrong… I realise this one was all my fault – multitasking is NOT always a good thing… but at least I learned a valuable lesson – too much of a good thing can really be too much!

Cheers, Shelley

Leave a comment »

Foods high in zinc… important for growth!

In a previous post, I promised I would pass along more information foods high in zinc.  Zinc is mineral important for growth, and one that Henry’s dietician was wondering if he was getting enough of.  Because Henry’s homemade blended food contains both oil and molasses as sources of energy, it is important to ensure that the veggies, fruits, grains and meats included pack a powerful nutritional punch.  He doesn’t eat a huge “volume” of food, so getting a well balanced diet into what he does eat is vital.

At our last check-in with Ali, our “angel” dietician, Henry weight was increasing faster than his height… a possible indication of an under-balanced menu. Thus… she inquired about his zinc intake.

I, of course, had absolutely no idea!

I am a firm believer in the “Grandma-inspired” philosphy of having a colourful plate – if there’s lots of colour on your plate, then bets are you’ve got your nutrition covered (assuming the colour isn’t coming from different flavours of potato chips!).

According to the Dieticians of Canada document Ali sent, zinc is needed in small amount each day for optimum health, and it can be found in a variety of foods.  It also helps the body “use carbohydrates, protein and fat, strengthens the immune system and heals wounds heal”.  Given Henry’s age, he needs between 3 – 7 mg of zinc per day.  The best sources for zinc are seafood, meat, seeds, and cooked dried beans, lentils and peas. Looking at a typical menu for Henry, it seems he may or may not be getting his minimum 3 mg per day.

Here’s an example, using the amounted listed on the “Sources of Zinc” chart from Health Canada:

Grains:

1/2 cup quinoa – not listed on Ali’s chart, but according to another website it is an excellent source of zinc with between 2-2.8 m pg per 1/2 cup

1/2 cup wild rice – 1.2 mg

Fruits:

1/2 cup pears – not listed

1/2 cup banana – not listed

Veggies:

1/2 cup tomato – not listed

1/2 cup broccoli – not listed

*** the only fruits and veggies listed on the Health Canada chart are heart of palm, cabbage and mushrooms

Meat & Alt.

1/4 cup chickpeas – 0.3 mg

1 boiled egg – 0.5 mg

Milk:

1 cup rice milk – 1.1 mg, according to the Ryza package

Oil:

3 tbs olive oil

Extra:

2 tbs molasses


Based on this quick calculation, Henry is getting between 3-7 mg of zinc most days.  However, on days that he doesn’t have any quinoa in his food, he may be falling short.  On these days, it’s important to ensure he has meat – beef or poulty – to make up the shortfall.

All of this just reaffirms my belief that lots of variety is the key.  Henry’s little tummy has difficulty digesting a number of foods, but I still try to squeeze in as many colours as I can!

Cheers, Shelley


Source: Health Canada, “Canadian Nutrient File 2007b”

http://www.wholehealthmd.com/ME2/dirmod.asp?nm=Reference+Library&type=AWHN_Foods&mod=Foods&mid=&id=D18F2C4462B74726B0C2D1FD8A8A65B8&tier=2


Leave a comment »

Traveling with a homemade blended formula (again!)

Our last trip to Texada Island was such a rousing success, we decided to do it again!  Yippee!!!

We packed our car and off we went to Salt Spring Island.  It was a lovely extra-long weekend and even better, the weather held out and we had sunshine for most of the trip… not bad for early October!  The trip was only 4 days, so I decided to try making and freezing Henry’s food in advance, instead of bringing the blender with us.

3 days prior to leaving, I gathered all my supplies and started making batches of food.  I decided to keep it simple and used a standard rotation of food without a lot of variation.  This was partly because it was easier given the number of batches I hoped to make, and partly because Henry was still throwing up a bit from his cold, so I wanted to use only foods he was very well accustomed to.   I prepared all the foods in advance – so had rice, quinoa, boiled eggs and chickpeas already made, plus fruits and veggies washed.  Shawn was home and had been enlisted to help wash & slice, and entertain Henry in the other room when the blender was on (still my main pet-peeve about the Vitamix blender… too loud!).  My goal was to make a minimum of 7 batches; enough for our trip, the day after we returned and two spares in case jars broke in the freezer.

Side note… canning jars normally shouldn’t break when frozen, unless filled too full.  But I have had several break, even when only filled half-full.  I think this might be because I got lots of hand-me-down jars from my step-mom and mother-in-law.  These jars are well over 30 years old, so may already have very small hairline cracks forming that can’t be seen yet.  But when frozen, the pressure breaks them.  I have several new jars of various sizes and none of them have broken when frozen.  I don’t know for sure this is the answer… but having asked around, it is my best somewhat-educated guess.


I felt like I was part of a science experiment gone wrong!  There was food everywhere… bowls piled on top of bowls, cutting boards dangling precariously off the edge of counters, and more food on the floor than in the blender… or at least that is how it appeared to me!  I’m a messy cook by nature (okay… maybe I’m just messy) and given the amount of food being sliced and measured, it was a catastrophe waiting to happen.

Henry was kept busy picking up all the food I dropped on the floor – luckily for me he’s fully into his “help mama” stage and loves doing clean up :).  What a great stage… I hope it last very loooooong time!  I’ve read other blogs where people routinely make multiple batches of food at one time… what a great skill to have, but sadly not one I have current attained.  :(.  I still find that if I make 2 batches at once it takes well more than twice as long!

Oh well… enough about abhorrent cooking skills (if more info needed… talk to my hubby!), in the end I had 6 lovely batches of food in the freezer and one in the fridge.  Miracle of miracles, not a single jar broke so we set.   On the day we left, I packed 6 quart-sized jars from the freezer, 8 500 ml jars from the fridge, plus some snacks into the cooler and they all stayed nicely cooled until we arrived on Salt Spring Island.  So cooled, in fact, that all the jars from the freezer were still completely frozen.

So far, so good… maybe next time we’ll travel by plane!  (am I nuts????)

Cheers, Shelley

Leave a comment »

Lessons Learned… foods that are hard to blend

For this “Lessons Learned” I thought I’d focus on what I’ve learned about how different foods blend together in Henry’s homemade blended food.  With the Vitamix blender, just about anything can be added in, but some foods are still harder to blend than others.


Blueberries: super good for you, but can’t be blended for the life of me.  Those pesky little seeds keep clogging this feed pump no matter how long I blend for.  I’ve tried other berries (raspberries, blackberries and strawberries) and they work fine… it’s just those stubborn blueberries.


White rice: too sticky!  Even blended with other foods, the rice coats the tubing and makes it hard for the pump to push it through.  Brown rice is fine, its dense enough that blends better.


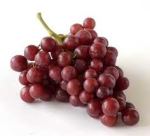
Grapes: made the mistake of buying seeded grapes once – what a nightmare!  A whole day of error messages from the pump because the seeds were small enough to get through the feeding pump, but they got jammed in his button instead.  Oddly enough, even with seedless grapes, I can blend them with other foods no problem, but when I tried to puree just grapes, the skins wouldn’t breakdown and the final product was very lumpy.  Henry loves the taste of grapes, but we have to be very careful he doesn’t choke on the skins.


Bananas, Oatmeal and Yams: individually they are wonderful, in combination the food was so thick I could have used it for cement!  I ended up having to add so much milk to thin it down that I ended up with two days worth of food.  Too much volume!


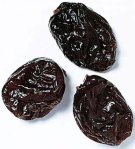
Prunes & Raisins: prune juice – great!  dried prunes – not great!  They remain too chunky and regardless of how long I blended I could see little chunks floating around in the blender.  Raisins work mildly better, but still found them hard to blend.  If I put them in the blender first, so they were right near the blades, then it is usually okay.


Celery: too stringy!


Soy Milk: this one surprised me.  I don’t use it very often, and I think Henry’s having a hard time digesting it, so I’ve stopped altogether.  But the times I have used a full cup of soy milk, the final blended liquid turned into a mousse-like consistency.


These are all the examples I can think of for now.  As I come across new foods which I find  don’t blend well I will keep adding to the list.

Cheers, Shelley

Leave a comment »