Henry's Homemade Formula

Our journey towards adding "real" foods into Henry's Homemade Blended G-Tube Formula

When did feeding my child become a medical procedure?

I wrote a post by the same name – so long ago now, it seems – when we were first introduced to g-tubes and buttons, syringes and pumps, bolus feeding and commercial formula.  Somehow Henry “eating” was no longer in the picture.  It was my attempt to claw my way back into his life.  To reclaim my role as mom, in a world that seemed completely foreign.   Now sadly, the same kinds of thoughts are swirling through my mind… but for a very different reason.

It is actually a very exciting time around our home… Henry will be starting preschool this fall.  I haven’t wrote about it yet, as I wanted to get comfortable with the idea myself first, but there will be lots more to come.

But with all this excitement comes a few challenges, and it is one of these that has ruffled my feathers a bit.  You see, while at preschool Henry will participate at snack time both by exploring the same foods the other kids are eating, and by eating a small snack through his tube.  The preschool teachers will learn how to feeding him… something that is both exciting and scary for me.  To be able to do this Nursing Support Services – part of the public health service – is involved with the training, writing of a “care plan” and follow up inspections to ensure that Henry is cared for safely.  It’s a wonderful service designed to make sure schools and day cares are as inclusive as possible. And I am very thankful for it.

However, it was part of this care plan… one little step… that has my mind racing…

put on gloves”.

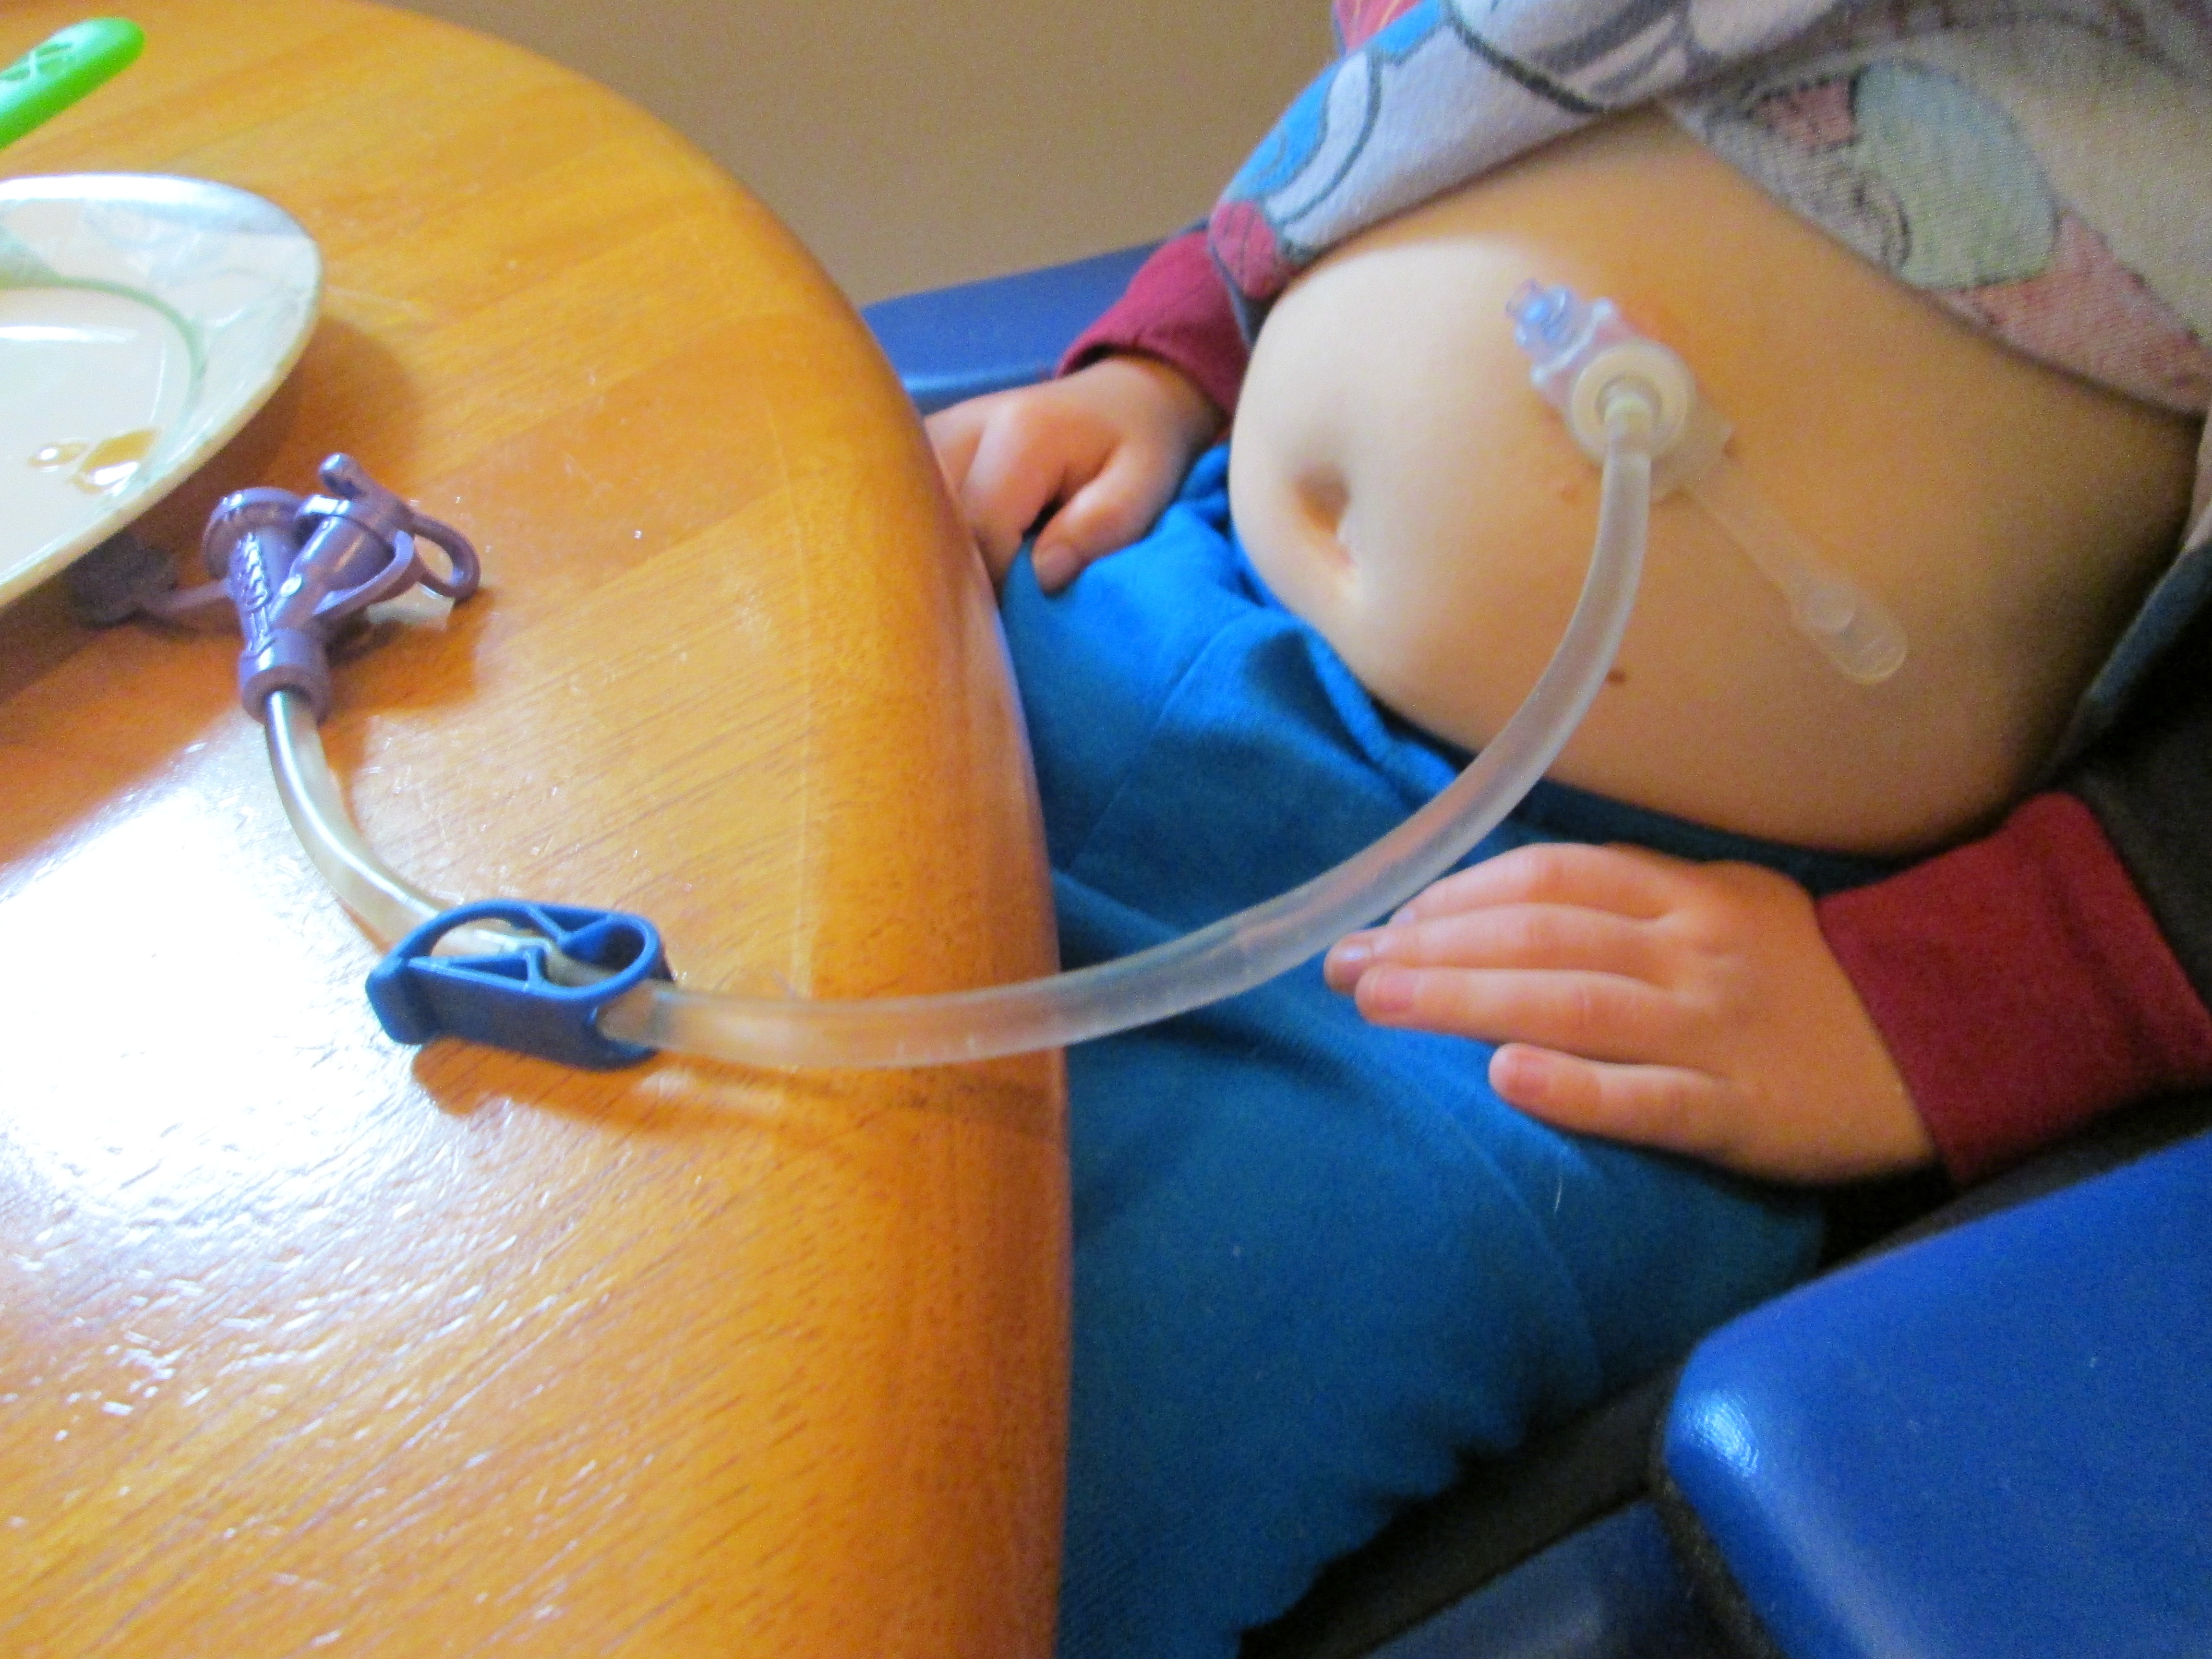
It’s somewhere around step #10, after washing hands, warming up Henry’s food, and filling the syringe with water… but before putting on his extension tube.

“put on gloves”.

There is nothing that screams “NOT NORMAL”… “DIFFERENT”… “HAZARDOUS”… than the need to put on latex rubber gloves.  We are used to gloves in the hospital – everyone wears them.  Along with masks, gowns and sometimes face shields… it is the usual hospital uniform.

But do you need to wear rubber gloves to feed your child?  For most of us… the answer is no.

I get that eating through a food button isn’t exactly “normal” for most people, whatever “normal” may be.  I get that.  I’m not hoping for “normal”, but I am hoping for “normalization”… that lovely feeling that being different is just fine.  And all my interactions with the preschool teachers so far have left me with nothing but confidence. They talked about putting a food button on one of the dolls in the playhouse…using circular band aides to give all the kids food buttons… having all the kids lick their fishy crackers before eating them… or put teeth marks in their banana.  All things that make Henry’s food button a “normal” part of the preschool program.

So when I read those three little words… “put on gloves”… my dreams shattered.  Melodramatic perhaps… but that’s me.

The problem is, when I asked about the need for gloves, I was told a perfectly logical response.  Anytime a care giver may come in contact with bodily fluids they are trained to wear gloves.  When using a food button, it is common that a small amount of gastric fluid, or stomach juice, leaks out.  It’s not a lot, but it does leak.  For us, that’s just a part of life.  But I get that someone else may not want my kid’s stomach juices on her hands.  I get that.

And that’s my problem… I get it.  I don’t like it.  But I get it.

When I asked if they “had” to wear gloves, I was told that it has to be their choice.  Some caregivers choose not to, but they cannot be pressured.  So basically… I can’t grovel, beg, plead or in any way make them feel guilty.  No problem.

But what do I do if they choose to wear gloves?  I really do not want Henry to eat with someone wearing latex rubber gloves.  That is not “normal”.  My first instinct is to say I “will not” have Henry eating with someone who wears gloves.  But so far I haven’t come up with any better options.

I want him to eat.  I want him to sit at the snack tables with all the other boys and girls.  I want him to explore foods with his mouth.  And I want him to eat through his tube.  And I want it all to be okay.  And I’m sure in the end it will be.  But right now… my mind is racing and I’m just not sure how to turn it off.

So… I spill out my thoughts in hopes that just writing them down makes things better.  So often it does.  And I’m crossing my fingers that this time it does again.

Cheers, Shelley


Leave a comment »

Adventures with Food… some photos

Recently Henry has been really into exploring his food.  Here are a few photos…


Our favourite birthday party activity - decorate your own cupcake!

Our favourite birthday party activity – decorate your own cupcake!

When asked what he liked about the birthday party, Henry said... "I really quite liked the frosting!"

When asked what he liked about the birthday party, Henry said… “I really quite liked the frosting!”

"Look at my big tummy!" says Henry after tasting something at mealtime.

“Look at my big tummy!”


Mmmm.. .french fries and ketchup

Mmmm.. .french fries and ketchup


Steak!

Steak!


Sucking the juice from a watermellon slice... yum!

Sucking the juice from a watermelon slice… yum!


Biting watermellon - look at the teeth marks!

Biting watermelon – look at the teeth marks!


Chocolate milk moustache

Chocolate milk mustache

"Turkey" smiles

“Turkey” smiles

Corn on the cob!  Tasting the "corn juice"... aka... loads of butter and salt!

Corn on the cob! Tasting the “corn juice”… aka… loads of butter and salt!

Corn caterpillars...  we cut the niblets off the cob and made caterpillars.  Henry tasted each and every one of them and then spit them onto his side plate.

Corn caterpillars… we cut the kernels off the cob and made caterpillars. Henry tasted each and every one of them and then spit them onto his side plate.


As you can see… we’ve been having lots of fun lately!


Cheers, Shelley


1 Comment »

Henry’s Nutriport brand feeding tube

Henry has been using his Nutriport brand Skin Level G-Tube by Kangaroo for several months now, so it must be time to describe our experiences so far.  To sum it up… so far, so good!

We switched from the Mic Key to the Nutriport earlier this year as the Mic Key kept coming out – both with the balloon popped, and with it still inflated (ouch!).   So after lots of internet research, and a meeting with Christine – the g-tube nurse at BC Children’s Hospital, we made the switch.


A Quick Recap of Choices:

MicKey – the first choice in BC for most patients.  Seemed good at first, but Henry’s kept falling out.

Nutriport – very similar is shape and design as the MicKey.  The balloon has a slightly different shape.  Is also replaced every 3 months, at home, by the caregivers

BARD – a more “permanent” button, it is similar in shape but is only replaced once per year, typically in radiology and while the patient is under anesthetic (especially with younger patients).

AMT – according to blogs, it is well liked, but cannot be accessed in Canada as there is no Canadian supplier.  Apparently families would need to travel to the US to obtain on.


A Brief Description:

The nutriport is a skin level g-tube, meaning it is a low profile device that sits close to the skin.  It comes with both bolus and right angle extension tubes, although we primarily use the bolus one.  This button does sit slightly differently above the skin, and this is an unexpected benefit for Henry.  While the MicKey “under side” is flat on the side, the nutriport has two “feet” that raise it up ever so slightly above the skin.  This seems to result in better air flow around the stoma (the technical term for the hole into Henry’s tummy), and less irritation.  But beyond this, it functions pretty similarly to the Mickey.


A Few Photos:

Henry having breakfast :).  His pj’s typically cover up the button, so you can just see the tube coming out from underneath.

IMG_0916

A closer look at the button itself, with the extension tube attached.  We use the bolus extension tube (designed for “meals” versus the right angle tube designed for continuous feeding).

IMG_0915

Here’s another photo of just the button, with the flap open but no extension tube attached.  Those people familiar with tubes will note that it look very similar to most other skin level g-tubes.

IMG_0913

Here’s a photo of the two types of extension tubes.  Here’s where the nutriport and the Mickey differ.  We find the nutriport tubes to be far superior in terms of longevity and usability.  They are longer and wider (a drawback for someone who is volume sensitive), but make them much easier to use for homemade blended meals.

IMG_0923

A comparison of just the bolus tubes – which are typically the ones used with homemade foods – really shows how the nutriport’s are better for this purpose.  The Mickey’s bolus tube has a permanent angle, presumably to make it easier for self feeding.  But most blogs I read found this counterproductive, and personally we hated it.  In addition, the Mickey’s bolus tube has no port closures at the end.  Meaning that between syringes, even when clamped food would leak out.  The nutriport’s bolus tube has the same port closers as their right angle tube does.  Plus it is a flexible tube with no permanent angle, making it much more functional for both self feeding and care giver feeding. Overall, so much easier.

IMG_0924

Here are two photos of the button itself, first the nutriport and then a side-by-side of the nutriport and Mickey.  In the first photo, you can see the two small “feet” that raise it up ever so slightly.

IMG_0926

In this one you can see the difference in attaching the extension tubes.  The Mickey’s tube are the “click and turn to lock” style.  Meaning that once attached the extension cannot be removed until it is turned again.  Seems good for ensuring the tube doesn’t come out during feeding, but somehow with Henry’s wiggling, it would come off anyways.  And neither Granny (Shawn’s mom) or Grandma (my mom) got the hang of attaching the tube… blame it on their failing eyesight.

The nutriport is just a “push in” style.  There is no turning to lock required… just a solid push and it’s attached.  This took us a while to get used to, and you have to ensure you have a good grip on both the tube and the button to attach it, but now it’s no problem.  This also means that it can come out easier.  At first this seemed like a potential problem, but really it’s been a benefit.  It certainly doesn’t pull out easily, but in case it gets caught (like in a cupboard door), or pulled (like by a 10 month old younger brother) instead of pulling out the whole button or damaging the skin, the extension tube simply comes off.

IMG_0928

Here’s a side by side of the two different buttons with the balloon inflated – Mickey on the left and nutriport on the right.  You can see the slightly flatter top of the nutirport’s balloon.  We think the “egg” shape of the Mickey might be why it was falling out – literally being pulled through the hole.  The flatter top of the nutriport balloon hopefully keeps it in better.  Again… so far so good.

IMG_0962

Pro’s

  • It hasn’t fallen out!
  • extension tubes better suited for homemade blended food: wider tubing, ports that close on bolus tube and more flexible.
  • extension tubes stand up better to longer use.  The Mickey tubes would discolour and begin to permanently crimp after about a week, making it even harder to use a syringe.  The nutriport tubes clean easier, don’t discolour and don’t crimp.  We used one bolus tube for over 3 months, and with good cleaning it was still as good as ever.  I know, not recommended, but we couldn’t get any other bolus tubes at the time, so we had to make it work.
  • The “feet” raise the button up slightly, and this has reduced irritation and redness around Henry’s stoma.  He doesn’t have much trouble with it anyways, other than a bit of itchiness at times, but now it is even better.
    • he used to get some leakage from around the button. Not out of the button itself, but out of the stoma.  This was considered common and we typically had to change his shirt daily as it would be discoloured on the inside.  Now he has almost no leakage, which we attribute to the different shape of the balloon.


Cons:

  • It is less well-known, at least here is BC, which made getting supplies a bit of a challenge at first.  But a huge thank you to Christine from BCCH for helping get the tubes for us.
  • the extension tubes are considerably wider, and the right angle tube is a lot longer, than the Mickey.  Could be a drawback for a person who is very volume sensitive as it takes up to 30 ml of water to flush.
    • another drawback of the wider tubing is that chunks that would have been caught in the Mickey tubing, now get caught in the button itself.  We have less clogs overall (which is great!) but end up clearing the button more often than the tubing.
  • The buttons tend to leak fluid when open.  It isn’t typically a large amount (maybe 1 ml), but the Mickey rarely did that.  Our first button leaks a lot… like pooling on the floor a lot.  Christine from BCCH recommended changing it earlier than scheduled in case it was just an older button or defective.  We haven’t had that problem again since.
    • however the valve is more sensitive on the nutriport, so if even a small piece of food is caught in it, it will leak.  Typically it is easier to clear and this resolves any leakage.  Fine for us, but still not very nice.


Summary

Over all, we’re happy with the switch and would recommend it to others.  It is especially beneficial to those people wanting to have a homemade blended diet, and we find it makes a HUGE difference in this regard.  Plus… it hasn’t fall out!


As always, if you have any questions, please feel free to comment.


Cheers, Shelley

Leave a comment »

Arg…. “Chunky” food that needs to be strained :(

As you may recall, we’ve been having trouble with our blender lately.  It has been over heating and shutting off for no apparent reason.  As we await the new blender’s arrival, I’ve been challenged some days to get Henry’s food blended well enough.

The result: we’re straining every meal :(.

Of course… Henry thinks this is the best thing ever and is having a blast… so I suppose I should take his lead and enjoy :).


IMG_0919

In attempt to see all things positive, here’s a quick tutorial on straining “chunky” food:

First (and most importantly for us), let your 3 1/2 year sit on the kitchen counter.  This will make all subsequent steps much more fun!  We ended up warming up the food as usual (measuring into a 1 cup pyrex measuring up, adding a splash of water, microwaving for between 25-45 seconds depending on amount).  I found warmed food strained easier than food straight from the fridge.  Once it was warmed, we used a standard wire mesh strainer – the type that sits on top of a bowl is nice – and a mini whisk.   Just make sure the wholes are small enough to catch all the fibers or chunks.  We used a 4 cup measuring cup to sit the strainer on top because we could then syringe the food directly from there.

IMG_0917

Here’s a  photo of what we “caught” in the strainer… no wonder his button was clogging!  As far as I can tell, I think the orange chunks are peace skins.

IMG_0920IMG_0913Unfortunately, even with straining the food, Henry’s button still got clogged a few times.  I did the usual – tried “pulling” back on the syringe to unclog… tried flushing with water… tried pushing the food through.. but in the end it just didn’t work.

This next step is completely unauthorized, and every specialist, g-tube nurse and pediatrician you talk to would cringe when told.  However, when researching how to unclog buttons when the “standard” protocol doesn’t work… just about every blog described using a toothpick.  And you know what… it works!

Yes, you must be careful.  Inserting the toothpick too far in the button could damage the one way valve and permanently damage it.   I don’t think I could actually hurt Henry… it’s not like I’m going shove the entire toothpick through his button into his tummy.  I guess if I did, it might hurt him, but I think I’m smart enough not to do that.

What I did do was visually inspect his button and try to remove what I could with my finger and then a clean cloth.  Then I used a tooth pick to “sweep” around the inside of the button.  Not directly into the valve – at least not at first – but just around the inner edges of the button.  And I got a lot out.

IMG_0914

But it wasn’t enough and the button was still clogged.  So I gently rubbed against the valve with the toothpick and removed one chunk that looked like a small piece of quinoa.

and….

problem solved!

(only to be repeated about 100 more times over the next few days!)

One thing that I have noticed about the Nutriport button (versus the mic key) is that the inside of the button – the space between where the extension tube attaches and the valve, seems a bit larger.  It’s nothing noticeable from the outside, but there’s a bit more room in there for food to hang around in.  At first I thought this might be a problem, but I think it’s actually a bonus.  Instead of getting caught inside the actual valve, most of the chunks were just inside the button and fairly easy to remove.  If they had been pushed farther into the valve it may have been harder to unclog and might have been damaged in the process.


Another one of those “not very pretty” things that somehow just becomes “normal” pretty quick.

cheers, Shelley

Leave a comment »

Goodbye Neve… our thoughts and prayers are with you

It is with sadness that we say goodby to Neve… Whitney’s little angle.  I never met Neve, but had the pleasure of chatting with Whitney several times, after she commented on the What is a G-tube page.  Neve was born with some complex stuff, to put it mildly, and never really seemed adjust to having her g-tube.  After many nights to the hospital, and I’m sure more tears than most of us can even imagine, she passed away during her afternoon nap.  She was at home and had a wonderful 5 days with her family before passing.

All this just reminds me once again how precious we all are, and how every moment really should be cherished… even the tough ones.  One book I read tried to re-frame getting your child to sleep as “treasure” time.  I’m not sure trying to sooth a screaming child to sleep at 2am is really “treasure” time in my books… but It better that than an eerily quiet home.

With love, Shelley

Leave a comment »

Fun with letters and food… homemade tactile letters!

This idea comes from our friend Nicola Lott with Notch Hill Learning. Nicola is an early learning specialist who is all about playing with your kids.  We love it!

When I saw this project on her blog I knew it was one I wanted to try – it incorporates food and letters… perfect for Henry.  It was simple enough for an early morning activity, didn’t require anything special, and was something Henry could do mostly on his own.  Essentially, we spelt “Henry” with food (and lots and lots and lots and lots of glue!).  PERFECT!

IMG_0873

We checked out the pantry and found some foods we wanted to explore.  We chose rice, dried beans, quinoa, ground flax and dried chickpeas.  Then we traced the letters of his name with glue and he got to dump and shake the food around to cover the glue.  We worked together with the larger food items (like beans), since they needed to be placed more than just shaken.  Then we covered the food again with lots and lots and lots of glue.  Serious… Henry would love to just make a huge pile of glue on some paper and call it done.  Ah… “art” is in the eye of the beholder :).   We let it dry for a few hours, gave it an extra shake outside and admired our work.


IMG_0874

A word to the wise… if you kid’s like Henry then be ready to use half a bottle of white glue and have to clean the floor afterwards… but it’s all in the name of learning :).

We have it hung on the wall in the kitchen right now and I notice he likes to trace his fingers along the letters when we walks past.  Perfect for recognizing the letters in his name, and using food in another fun way.


Thanks Nicola 🙂

Cheers, Shelley

Leave a comment »

Blender Breakdown… again!

Let me start off by saying that I love my Vitamix!!!!  And I really love Vitamix Customer Service!!!!

However… I love it less and less each time it breaks.  And this time… it was serious :(.

IMG_2541First… a little reminder…

We NEED this blender.  It’s not a toy or a fancy accessory… it’s how Henry eats.  No blender = no blenderized food.  No blenderized food and Henry can’t eat.  So we NEED this blender to work!

It’s broken down before,  but not this seriously.  The last time, customer service was able to send us new parts and we replaced them ourselves.  It never actually stopped working completely…

This time… it stopped completely!  I panicked…. SERIOUS panic!

We had been having trouble with it overheating and shutting off.  There is a built is auto shutoff, designed to ensure the motor doesn’t overheat.  A good thing in case someone is working it too hard, or using the wrong speed to blend something.  Simply wait a few minutes and it turns on again just fine.

However our machine was shutting off all the time.  And for no cause that I could determine.  I’d already contacted customer service and arranged a loaner so we could send ours in for repairs, so I was feeling confident.  Because we use the blender for “medical reasons” they will “sell” us a loaner machine for which they refund back all changes for once it is returned.  So yes, it costs a few hundred dollars, but it all works out in the end.

But the very next day, the machine quit and wouldn’t turn back on.  We always have some food frozen as a backup, but since parts are shipped from the US, it typically takes a week to get anything depending on how fast it goes through customs.  I didn’t have this much food.


So back on the phone with customer service…

In the end, I went to a local retailer that sells the Vitamix and purchased another one (another $600 on my Visa).  We used it for a week until our loaner arrived and then returned it.  I felt guilty, but it’s what customer service told me to do.  Apparently they allow all their retailers to accept returns with no questions asked.

A month later we got our original blender back with just about every thing replaced – at least that is what it looked like from the parts inventory included.

You’d think the story would be finished…. but no 😦

A couple of weeks later and the blender started turning off again.  I’d reduced the batch size… increased the liquid… and still it shut off.


So back on the phone with customer service…

This time… they are sending us a whole new blender! Yeah!  Since we never had any trouble with the two loaners… it must be something with our machine.

This is what I LOVE about Vitamix…

Every time I phone customer service they are FABULOUS!  I wish we didn’t have these troubles to begin with… but I am so pleased with how we have been treated.  And because we need it for medical reasons, they go out of their way to find solutions that will work.

THANK YOU VITAMIX!!!!!!!

🙂 🙂 🙂 🙂


(and cross your fingers our new blender is trouble-free!)


Cheers, Shelley

1 Comment »

Fun with Goop!

IMG_0680

We made Goop… and boy was it fun!

This idea came from my observation day at the Preschool Henry will be attending this fall.  Goop… aka… water + potato starch (or corn starch) + anything else you want + food colouring = a sensory delight for both of us!

IMG_0679

As you swirl it around it gets thicker and thicker… feeling slightly icky (my words) and slightly squishy (Henry’s words) between your fingers.  The more starch you add, the thicker it gets.  Once we’d explored the basic water & starch combination, we then checked out the dry goods section of our pantry to see what else we could find.

If memory serves we added cheerios, rice, quinoa, flour, beans, marshmallows, chocolate chips and smarties.  Then we added some colouring… one drop at a time.  The drops looked amazing – I wish I’d thought to take a photo of that.  By the time we were done we had one big brown blob of goop – not that attractive, but loads of fun.

For any kid – this would be fun.  For Henry – it was great to see him exploring the different foods and seeing what they do when they get wet.  Since he doesn’t eat by mouth, we talk a lot about how things turn “mushy” or stay “crunchy” or “break apart” inside your mouth.  The more he sees how foods change, the more comfortable he becomes with what happens when he puts something inside his mouth.

A word of caution though… be ready to get dirty!  Everything washed clean fairly easily, but the laminate floor was a bit of a challenge as the goop got in the grooves.  But since we also love mopping right now – this just made for our next fun activity 🙂

Cheers, Shelley

Leave a comment »

New Boots!

Gotta love them boots!IMG_0901
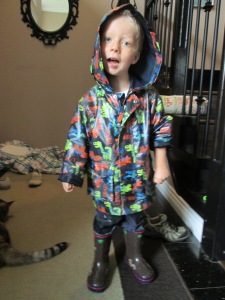
I actually debated A LOT about getting Henry boots.  He can’t wear his orthotics in them… which he really should be wearing as much as possible.  On the other hand… he needs something to wear outside in the rain.  It’s just not fair to tell a 3 1/2 year old that he can’t splash in the muddles for fear of getting his feet wet!  Last year we were forever trying to dry his orthotics and shoes out in front of the boiler.  In ended up that he was actually wearing them less… 30 minutes of fun outside meant wet foot wear for the rest of the day.

IMG_0902 So, I relented and we bought boots.  And they are cute :).

The compromise (in my own mind anyways!)… they will stay on the shelf in the coat closet and only be worn in heavy rain.  They will not become a daily occurrence (again… in my own mind!).

Cheers, Shelley

Leave a comment »

Henry’s New Orthotics

We visited our friend Eugene at Hodgsons Orthotics earlier this summer, as Henry had outgrown his last pair of orthotics and needed new ones.  Sometimes I can’t believe how fast his feet grow!  The design is very similar to his last pair, with three straps covering the area from his toes to just above his ankles.   Notice the cool fish pattern this time :).  Henry needs Supramaleolar Orthosis, or SMO’s to help support his feet and ankles.  These are the lowest type of orthotics… meaning they do not reach very high up his leg.

IMG_0908

IMG_0907

When wearing his orthotics, Henry typically takes a shoe size 1-2 sizes larger than what he would need otherwise.  And they have to be lace up… velcro or slip on just won’t go on over top.  He tends not to mind wearing them, and I think he knows that his feet need them.  In sock feet, his ankles sometimes turn and he falls more often.  Dr Reilly, our orthopedic surgeon, indicated that Henry will likely need some type of support for most of his childhood, especially during rapid growth spurts when his body is growing way too fast for his muscles to keep up.  On that note… we measured him this morning and he had grown over 2 inches in just under 4 months!

Here is a photo of what Henry’s feet look like when not wearing his orthotics:

IMG_0905

It’s a little hard to see, but his ankles turn in and he has very flat feet.  His left side is significantly worse, and he will actually drag his foot behind him when not in shoes.

But with the orthotics on, he walks with his feet almost parallel, and with much more control.

IMG_0910

We had some challenges this time around, with it taken significantly longer to get the orthotics.  The first set we received were of very poor quality, which didn’t make me happy.  But what I did very much appreciate was Eugene’s candid response that he was unwilling to give us an inferior product.  I didn’t even need to say anything – he beat me to it.  He remeasured Henry’s foot and ordered new ones that same day.

So… we waited longer, but in the end we got a new set of orthotics that will support Henry’s feet perfectly!

Cheers, Shelley

1 Comment »