Henry's Homemade Formula

Our journey towards adding "real" foods into Henry's Homemade Blended G-Tube Formula

Feeding Tube Awareness Week 2022: Friday – Educate & Celebrate!

Friday, February 11th
Make a plan to educate 5 friends, family members, or media sources about tube feeding. What obstacles have you or your child overcome? Celebrate the successes. Show your tubie love!

Today I’m in celebration mode! Here are a few moments that are particularly meaningful to me…

Thank you everyone, for your comments, support, kindness, and care. Cheers, Shelley

Leave a comment »

Feeding Tube Awareness Week 2022 – Tuesday: Nutrition

Tuesday, February 8th
There are long-term consequences to malnutrition and being undernourished. For some people, there wouldn’t be life without tube feeding, but for others they would continually struggle with malnutrition. Tube feeding makes it possible for people who aren’t able to eat enough on their own to get the nutrition they need to live.

Henry’s food button keeps him alive. It’s as simple as that. When he was younger I used to question myself constantly… should we have gotten his tube? Would he have eaten on his own eventually? Did we make it so he doesn’t eat? These questions and more would loop through my mind on a continuous feed, sometimes in the front of my mind, other times as a lurking niggle hiding in the background. But always there.

Now it’s easy for me to say – no food button = no Henry. I’m not meaning to sound dramatic (although I question writing it as it sounds dramatic to me). For me, it’s one of those “simple… not easy” statements. A few decades ago, when feeding tubes weren’t so common, and certainly weren’t common outside of a hospital setting, our lives would have looked very different.

It goes without saying we are thankful for his feeding tube.  If you didn’t know us and you saw the kids playing at the park… other than perhaps noticing that he looks a little different running, you probably wouldn’t take a second look. His food button is a big part of what enables him to grow and thrive.

I won’t lie – I have moments where I feel completely overwhelmed.  Those moments are fewer and farther between than they used to be. And now there more likely to be about his tween-ness, than his feeding tube.

For Henry we (read “I”) chose to do a homemade blenderized diet.  When we first started all this I hated feeding him formula from a can.  It either looked like a chocolate milk shake or powdered sugar, depending on the brand. It didn’t seem like “real” food to me.  That’s a judgement, I know that, and it speaks more to my feelings of inadequacy than to the nutritional content of commercial tube feeding formulas.  I couldn’t even feed my own baby… and that really triggered me.  I made it mean there was something wrong with me; I clearly wasn’t good enough; and there would never be enough I could do to make up for it. These thoughts still live inside me, and thanks to the help of brilliant therapists, I’m better noticing and reality checking them when they take up too much space.

We continued with homemade blended meals because it turned out that Henry has several food sensitivities that made typical commercial formulas not work for him.  It was a game changer when we started blending his meals.  It was almost 11 years ago and I still remember the difference clearly.  He went from meals that took at least 45 minutes, frequent vomiting and us walking on eggshells, to thriving, eating more and feeling better.  We no longer struggle so much with the “what” and “how much” of his meals. Sometimes he eats too much and gets a tummy ache, but gone are (most) of my anxieties around him not eating enough. “The Homemade Blended Formula Handbook” by Marsha Dunn Klein, was a HUGE resource, and continues to be my number one recommendation for people wanting help getting started.

Trusting and consent around his body are big ideas we are working with currently. Years of holding him down, against his will, “for his own good”, listening to him scream as we changed his food button or other such intervention, has left a lasting impact on his trust and feelings of body autonomy. Now we talk. And talk. And talk some more. Now it may take 8 months to change his food button that’s meant to be changed every 3 months. But it’s his call. It’s his determination, stubbornness, tenacity and will that decides when and how things get done. It’s not easy… for any of us. It’s a radical shift in how things used to be, and it pushes us all to our perceived limits at times. And it works, because we all grow a little more each time we navigate it together.

What I do know is that thanks to his feeding tube Henry eats WAY more nutritionally balanced meals than my other son (9 years old… processed meat & raw veggies please!).  Henry’s meals provide the nutrition he needs to thrive… and that’s all this mama can ask for!

Leave a comment »

Feeding Tube Awareness Week 2022 – Monday: Awareness

It’s that time of year again… Feeding Tube Awareness Week! Each year during this week, I share our story to raise awareness about feeding tubes and how they have changed our lives. It’s also a beautiful time for me to reflect back on where we’ve been. We have changed a lot over the year – as a family and as individuals. But what hasn’t changed is our gratitude for, and reliance on, this life saving piece of medical technology that allows our son to eat, grow and thrive!

Henry, age 1
Henry, age 11

Awareness
Monday, February 7th

Share information about why you or your child is tube fed. There are hundreds of medical conditions that can lead to tube feeding – most of which you can’t see. Most people do not understand why someone, particularly children, can’t eat enough to grow, thrive and live. Help educate people about the medical conditions that can lead to tube feeding.

Henry was born with a congenital myopathy – a muscle condition – that results in low tone, or weaker muscles.  Despite years of testing, his condition remains undiagnosed.  We know a lot about what he does not have, but we do not know exactly what his condition is.  What we do know is that it is appears to be a genetic condition, but its origin is not in one of the “common” genetic sequences.  Having said that, we are told there are thousands of obscure genetic conditions.  In the last couple years we thought we were narrowing in on a diagnosis – the genetic sequencing showed a specific “blip” that seemed promising. However a muscle biopsy was “non specific”, so we’re back to where we started. It may be we never know the exact cause, however new information is being discovered all the time, so we never know.

Because Henry’s condition is undiagnosed, it also means there was no “road map” to follow – no other cases to glean information from about what to expect.  As with all things, there are pros and cons to this – no precedents meant no idea what to expect.  But it also meant no preconceived ideas of what he might, or might not, be able to accomplish.  So as far as we’re concerned… the sky’s the limit :).

When Henry was born, he was a very quiet little guy.  He did not move, did not cry, did not fuss.  He couldn’t – his muscles were too weak to.  Seeing him now, he’s an active, outgoing boy.  His muscles are still weaker than his peers (and they likely will always be), but with some accommodations he can participate in and enjoy most of the same activities as his classmates.

Henry continues to eat exclusively through his food button (a mic-key brand, low profile gastronomy tube).  Because we make his food ourselves, he may very well be one of the best-fed almost 12 year old boys we know…

…broccoli, asparagus, kale, carrots and broiled chicken for breakfast anyone…?!?

That’s not to say he doesn’t eat chicken nuggets, and chocolate cake from time to time as well.  We used to follow a well planned, documented, calculated food guide when making his food. His doctors and my anxiety required the certainty of accurately measured nutrient counts. Now he gets a little of this and a little of that, with a few left overs thrown in :). It’s not as haphazard as it may seem (I can feel my anxiety rising even typing this!). It’s more than I’ve been making his food for so long now that I think I could do it in my sleep. I can rough measure proteins, fruits & veggies, carbs, dairy substitutes, fats, supplements, etc while making the rest of our dinner, and somehow it turns out okay every time.  

He continues to taste foods by mouth, the current favourites being chocolate or mint chocolate ice cream.  He eats very little by mouth these days, and we are less and less concerned by this. I think one of the best things we did was stop his occupational and feeding therapy several years ago. He got to just be a kid, and we all got to relax a bit.

While his “swallow” muscles have strengthened over the years, it is physically impossible for him to bite, chew and swallow a sandwich, for example.  His swallow is not strong enough to clear his mouth and push the food all the way down to his stomach.  The resulting “pooling” that remains in the upper throat area puts him at risk of aspiration (breathing in food/liquid).  However as he has had dozens of chest x-rays over the years and has shown no signs of aspiration, he has the go ahead to continue exploring foods by mouth, in a way that makes sense for him. When or if he shows interest in restarting, then we’ll discuss it as a family. Until then, he’s old enough that we follow his lead. It’s now him who’s in the lead, with us and his doctors in the supporting roles.

Henry received his first feeding tube at 2 month of age – a nasal-gastronomy tube (or ng tube).  This type does not request surgery, but is highly invasive in that it goes through the nose, down the back of the throat and into the stomach.  Just after his 1st birthday, Henry had surgery to receive his g-tube.  Almost 12 years later he still has his food button and we are so happy he’s getting the nutrition he needs to be a happy, healthy tween!

Cheers, Shelley

Leave a comment »

Henry’s Electric Bicycle!

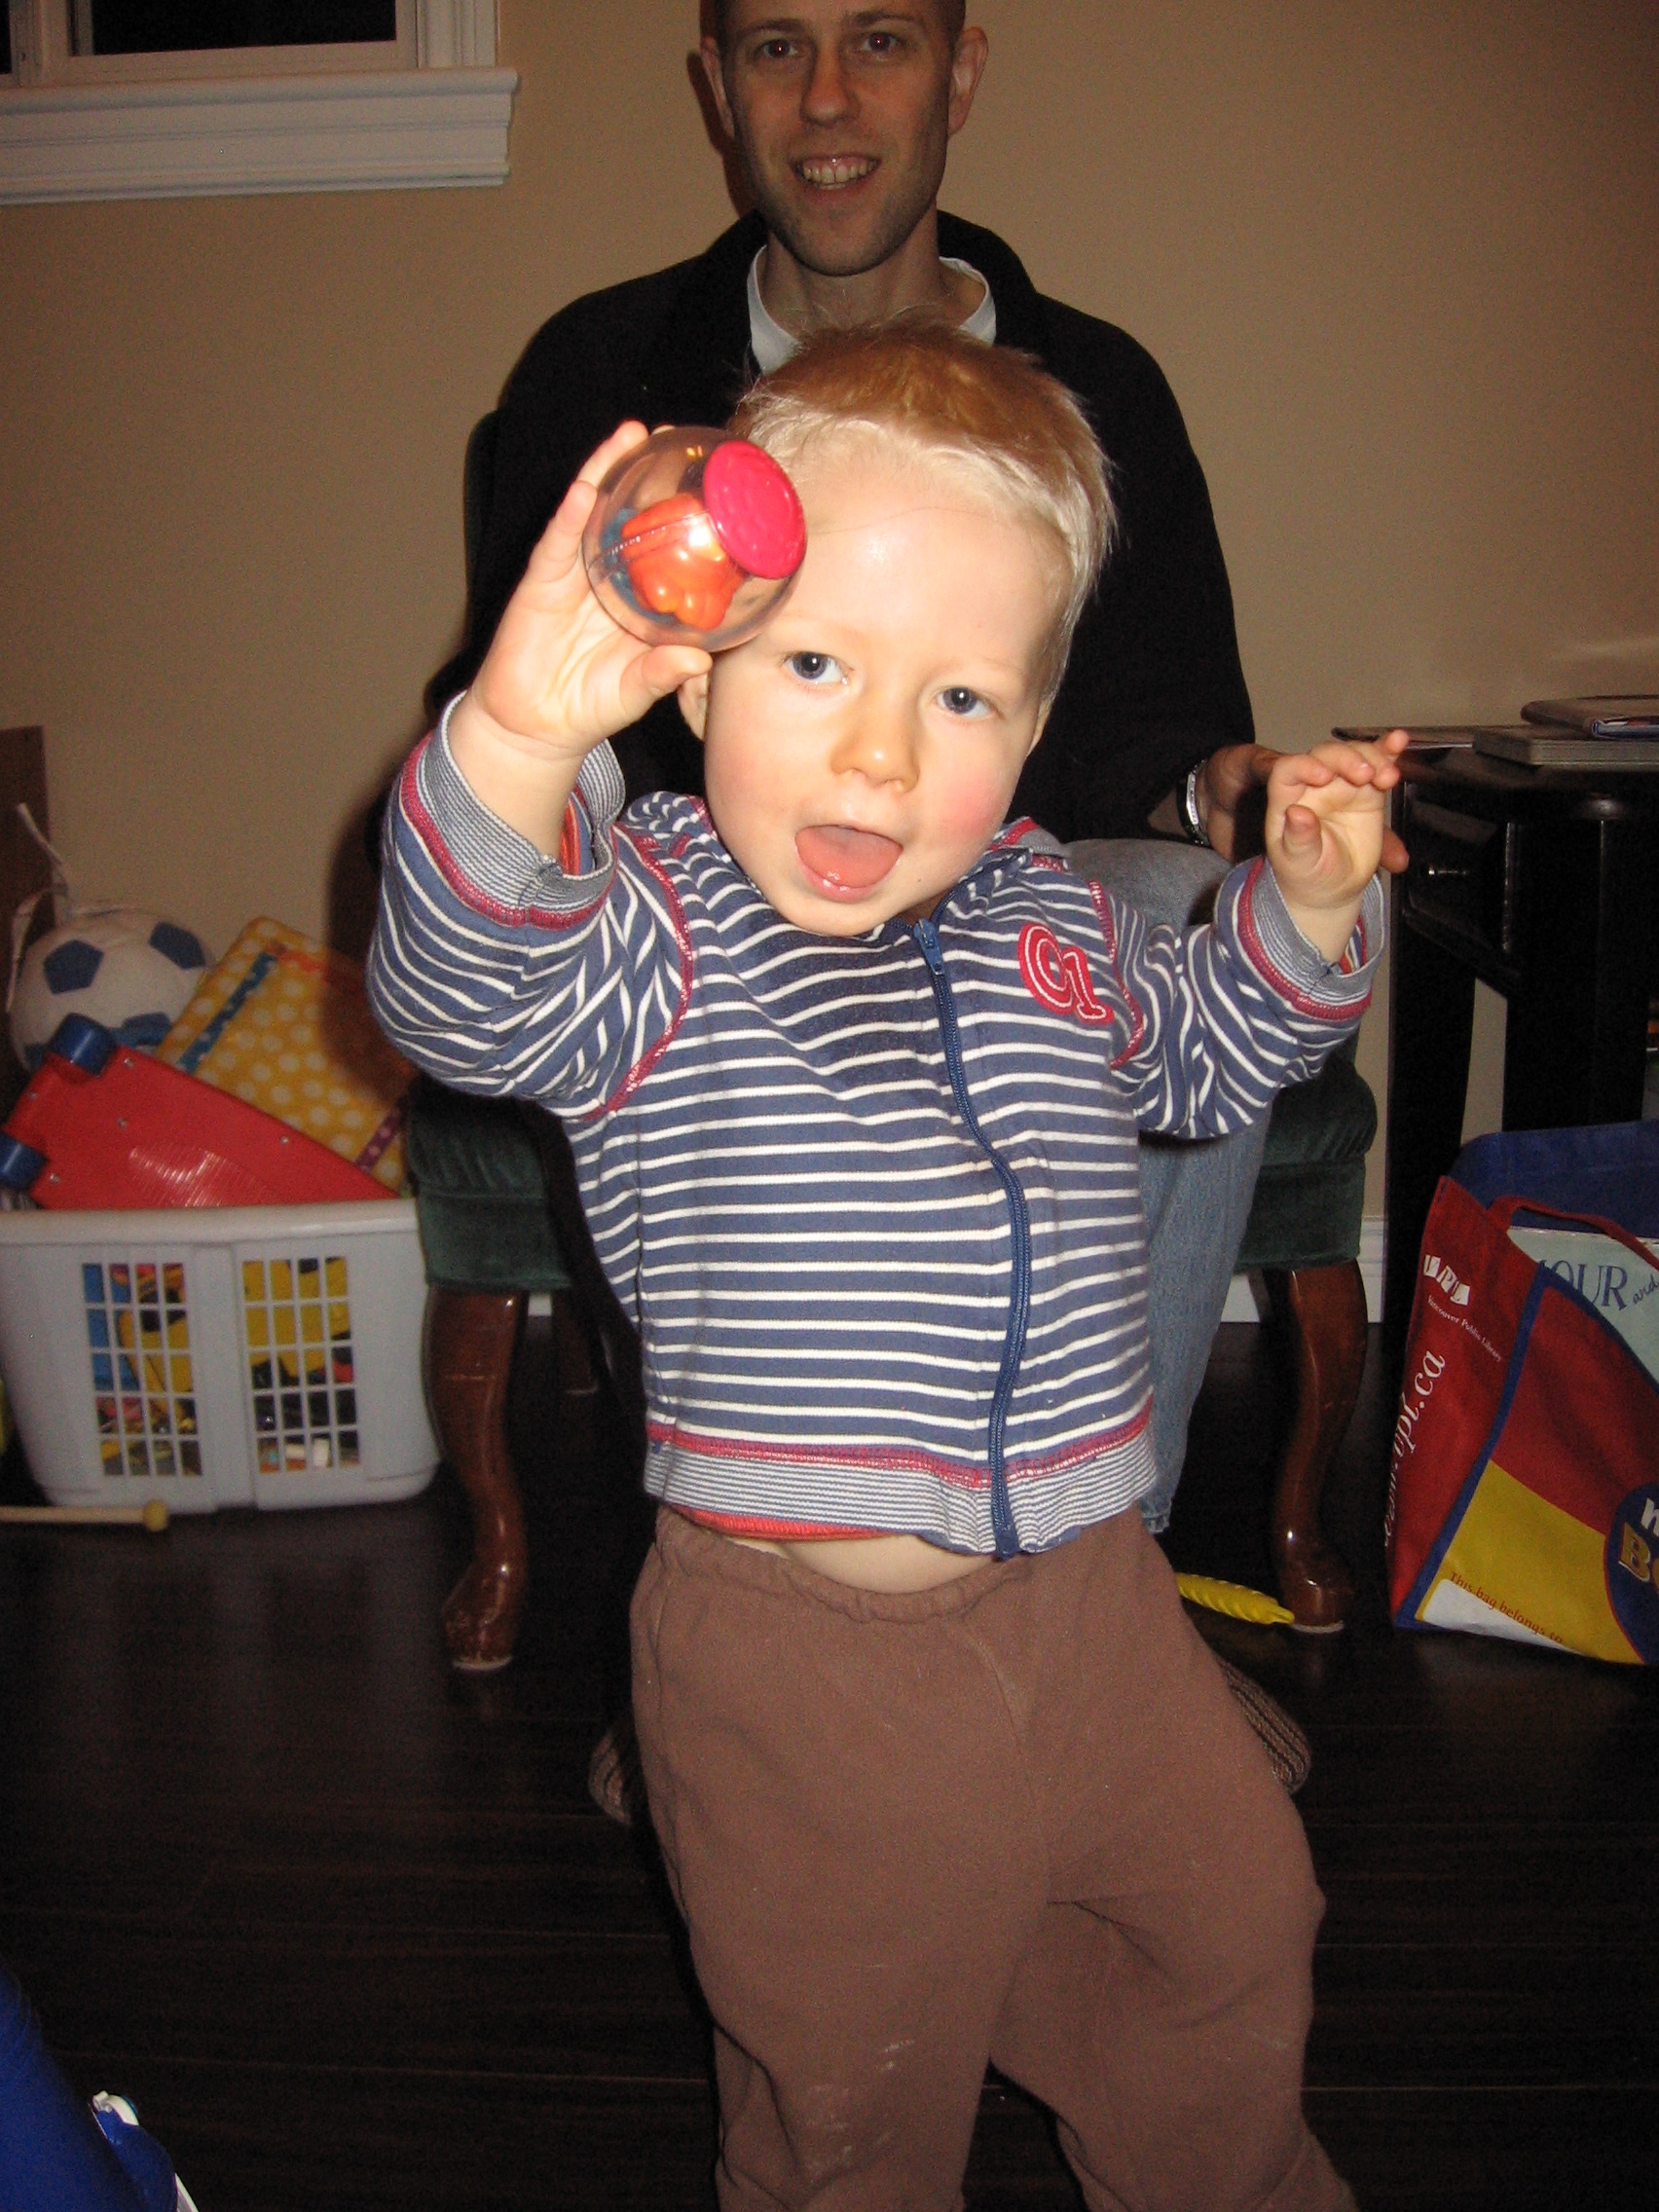
How amazing is this…

20171125_142722


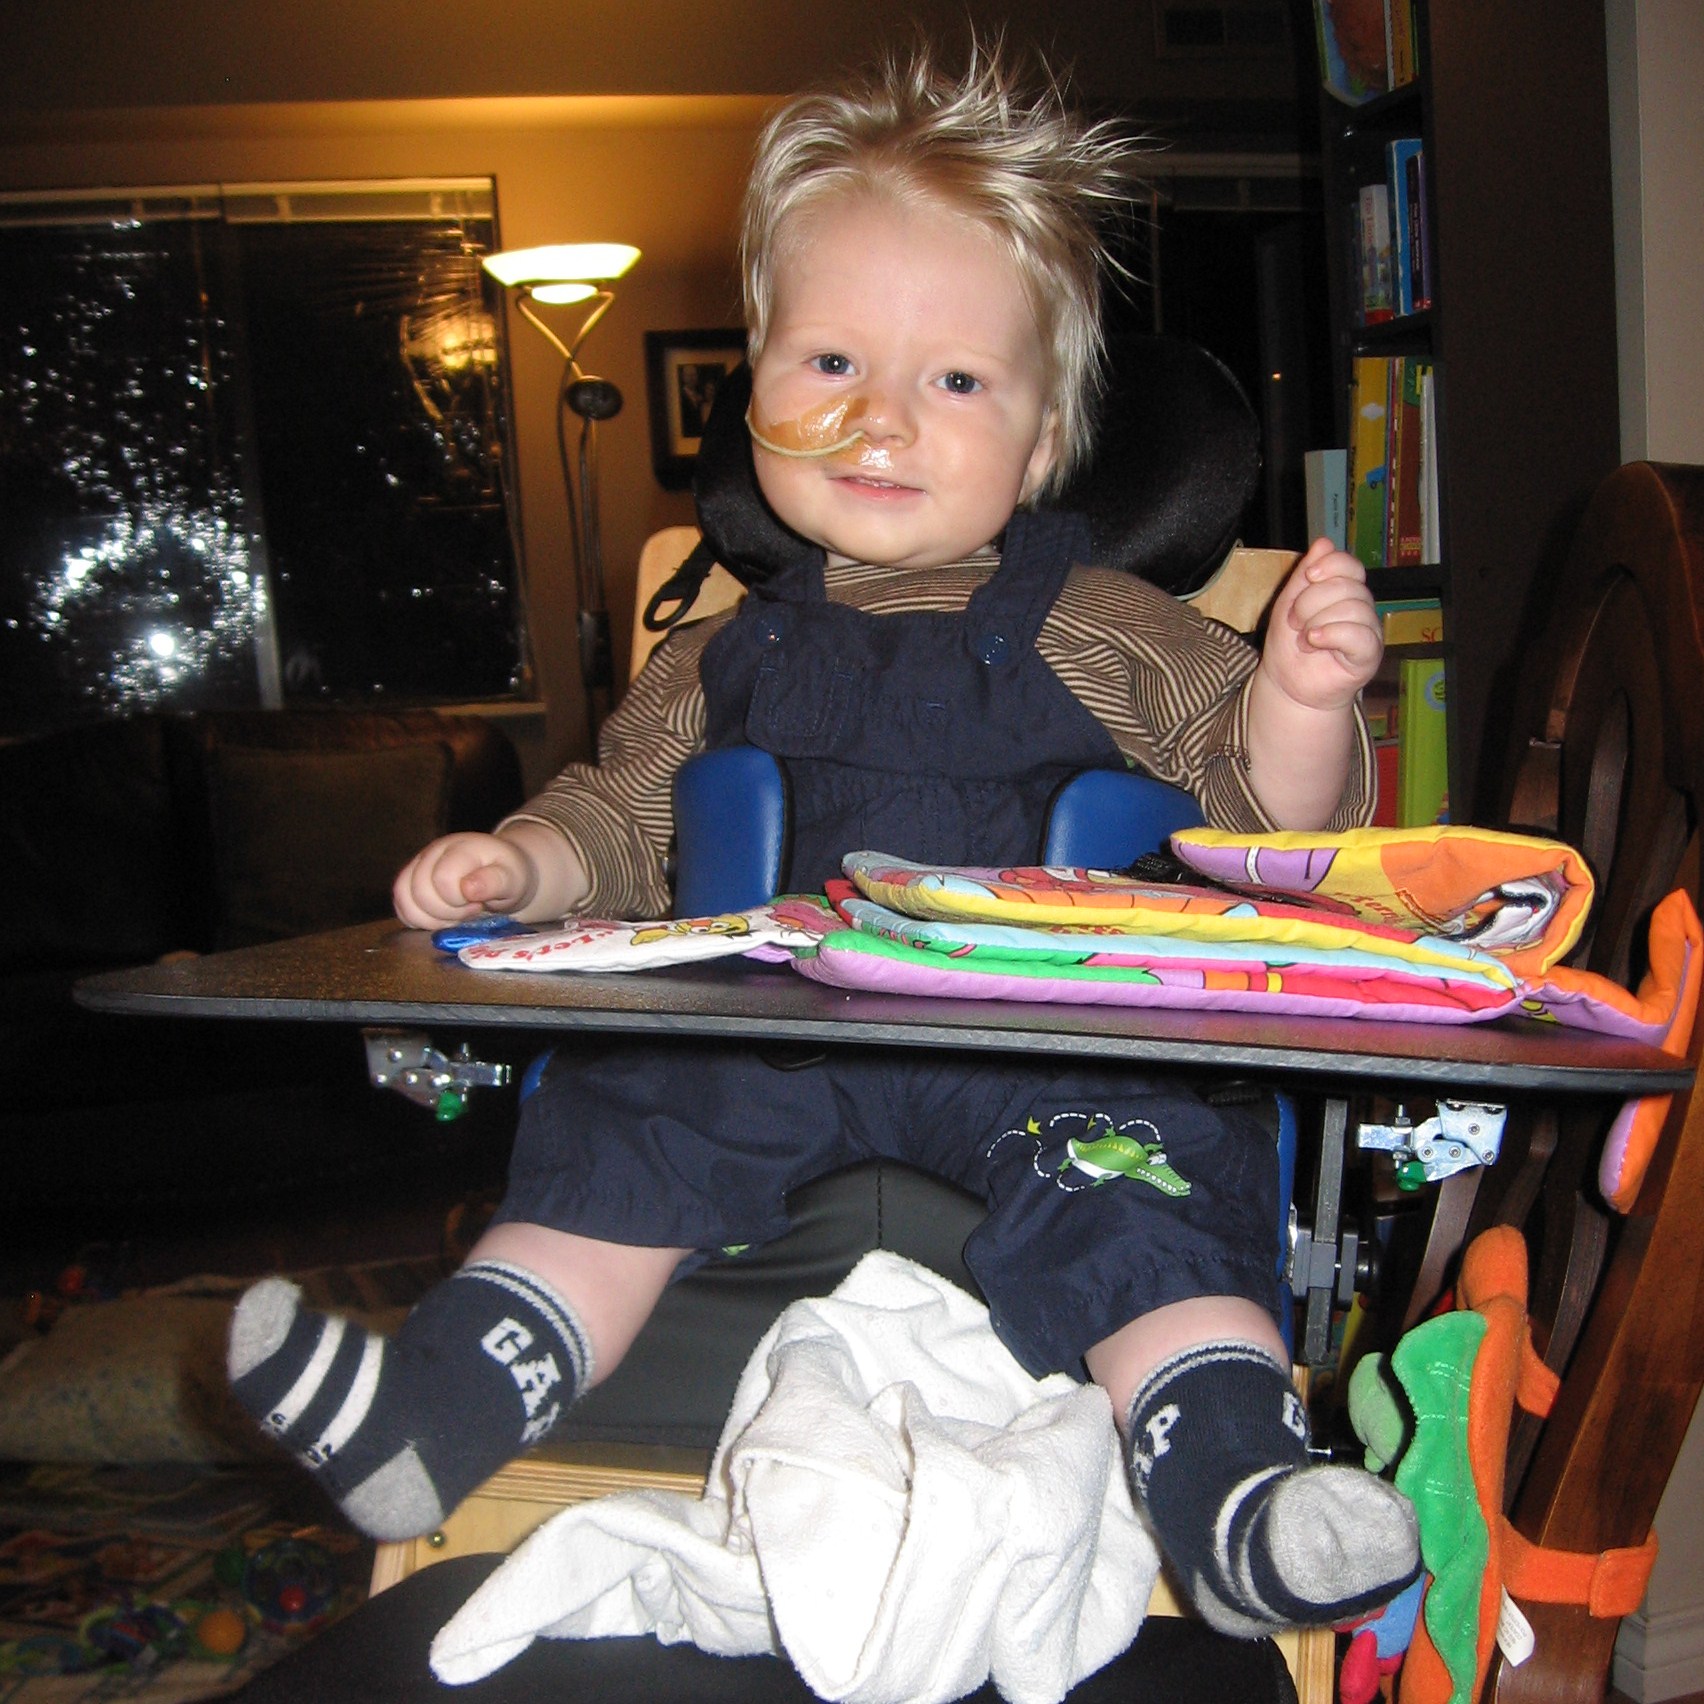
The journey to finding Henry a bike starting over a year ago, in the fall of 2016.  Henry was rapidly outgrowing his toddler bike, and the seat was already raised up well above the safe limits.  However Henry wasn’t strong enough to peddle a larger bike, and he so wanted to ride along with his brother.  So we kept pushing the limits and I kept hoping inspiration would strike for what to do next.  The seat post never broke, but Henry’s legs got so long it was impossible for him to ride the toddler bike anymore.

He went one summer not riding anything, as he was so frustrated trying to use a bike that matched his height.  We used trail-a-bikes as a family, which he loves, but it broke my heart to not have a bike for him to ride.  So the search began…

I spent close to a year researching and visiting any organization I could think of.  Among the many places I contacted were Sunny Hill Health Centre for Children, Bikes for All, Freedom Concepts, E Special Needs and Adaptive Mall.  If you know someone needing an adaptive bike or other adaptive equipment, everyone we met from these various organization were amazing!

But the challenge soon came clear – Henry isn’t “disabled” enough!  

There are some amazing adaptive bikes and trikes available, but Henry doesn’t need that much support.  He can ride a typical bicycle, he just doesn’t have the muscle strength to turn the wheels, nor the core strength to ride with two wheels.

This epiphany (and yes it was a major Ah-Ha moment!) led me down a completely different path… motors!

But this was not simple.  Ask someone in a bike store what they think about a 7 year old on an electric bike and you get worried responses.  Toss in that he has a physical disability and apparently people think you’re crazy.

As life often does, inspiration came from an unlikely place.  Our local elementary school hosts a bike fair in the spring, and in 2017 the wonderful folks at OHM Bikes volunteered to host the repair tent.  And we met Liam…

And Liam met Henry…

And Liam said yes!

It might very well have been the happiest day that year!  It was the first time someone actually met us and looked at Henry and said… yes, I think we can do that. 

As it turned out, they couldn’t.  But not due to any lack of trying!  Their battery and motor system simply didn’t fit on the size of bike Henry needs.   But it was a start.  It was acknowledgment that I wasn’t crazy… this might work… and it might be brilliant!

And it gave me the push I needed to keep going.  Shawn got more involved and started talking to people he knew through HUB and the Vancouver Bike Club, and based on what he learned, he started researching online. And then he found E Bike BC.

EbikeBC-Logo

Ali and his team at E Bike BC talked to us, learned about what we wanted to accomplish and said Yes!IMG_20171110_112910

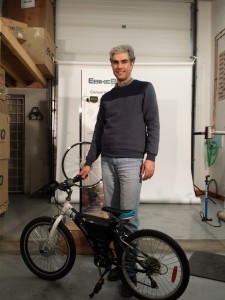
E Bike BC offers electric conversion kits, meaning you turn your existing bike into an electric bike, with the help of their know-how and components.  They had never worked with a child’s bike before, so they spent countless hours researching and finding parts to fit.  Their components are modular, so the battery pack could be designed to fit Henry’s bike and they even custom made some parts, so the battery pack could fit low down in the bikes centre, so the bike wouldn’t be too top-heavy.

Shawn put in a lot of hours at this stage, working with Ali to ensure the bike worked as we needed it to, and doing adjustments on the hand brakes and other parts to ensure Henry could use it effectively.  The technical details aren’t my specialty, but if anyone wants more information, please do not hesitate to contact us and I’ll ask Shawn to respond!

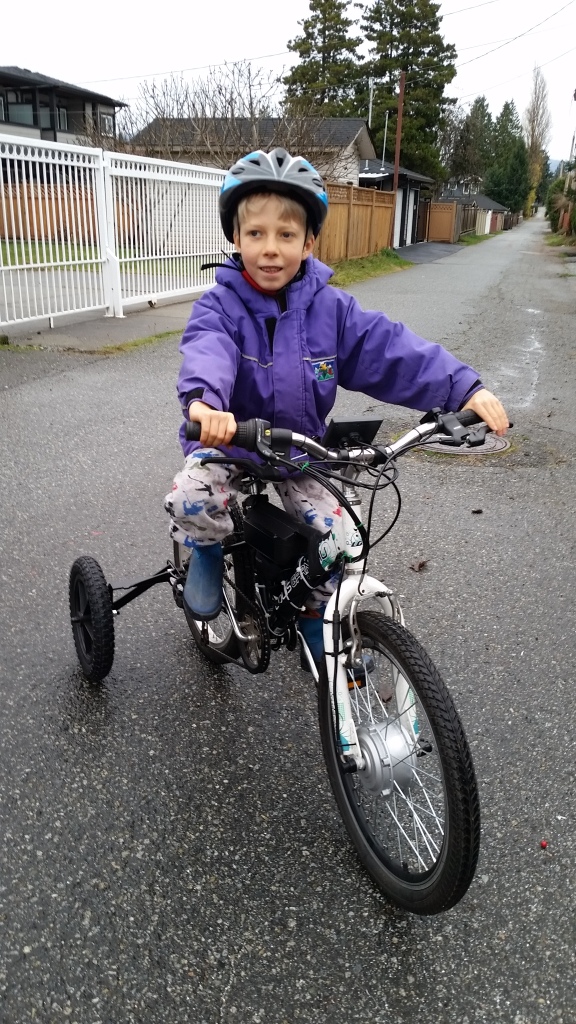
So, now we had a bike with a motor… but Henry needs training wheels in order to ride. Typical training wheels are designed to transition a child to two-wheel riding.  As such, they are not flush with the ground, and most can be slowly adjusted higher until a child no longer needs them.

But Henry needs a set of good, solid wheels – and I found Fat Wheels!

fat wheels

Fat Wheels Adaptive Training Wheels are adaptive training wheels for children and adults needing additional balance to ride a bike, whether it be a person with a disability, an older adult or anyone who wants to ride a bike without the fear of falling.


What is great is the whole system can grow with him, with relatively little cost.  The adaptive training wheels can be moved to larger bikes (although eventually he will need to go to a larger size).  The electric assist motor can be moved also, with only the front wheel (where the actual “power” is) needing to be replaced (since the wheel is specially made with this built in).  The battery pack and other components can be transferred.  And because Shawn is familiar with bike mechanics, we can order whatever might be needed and he could do the work himself.

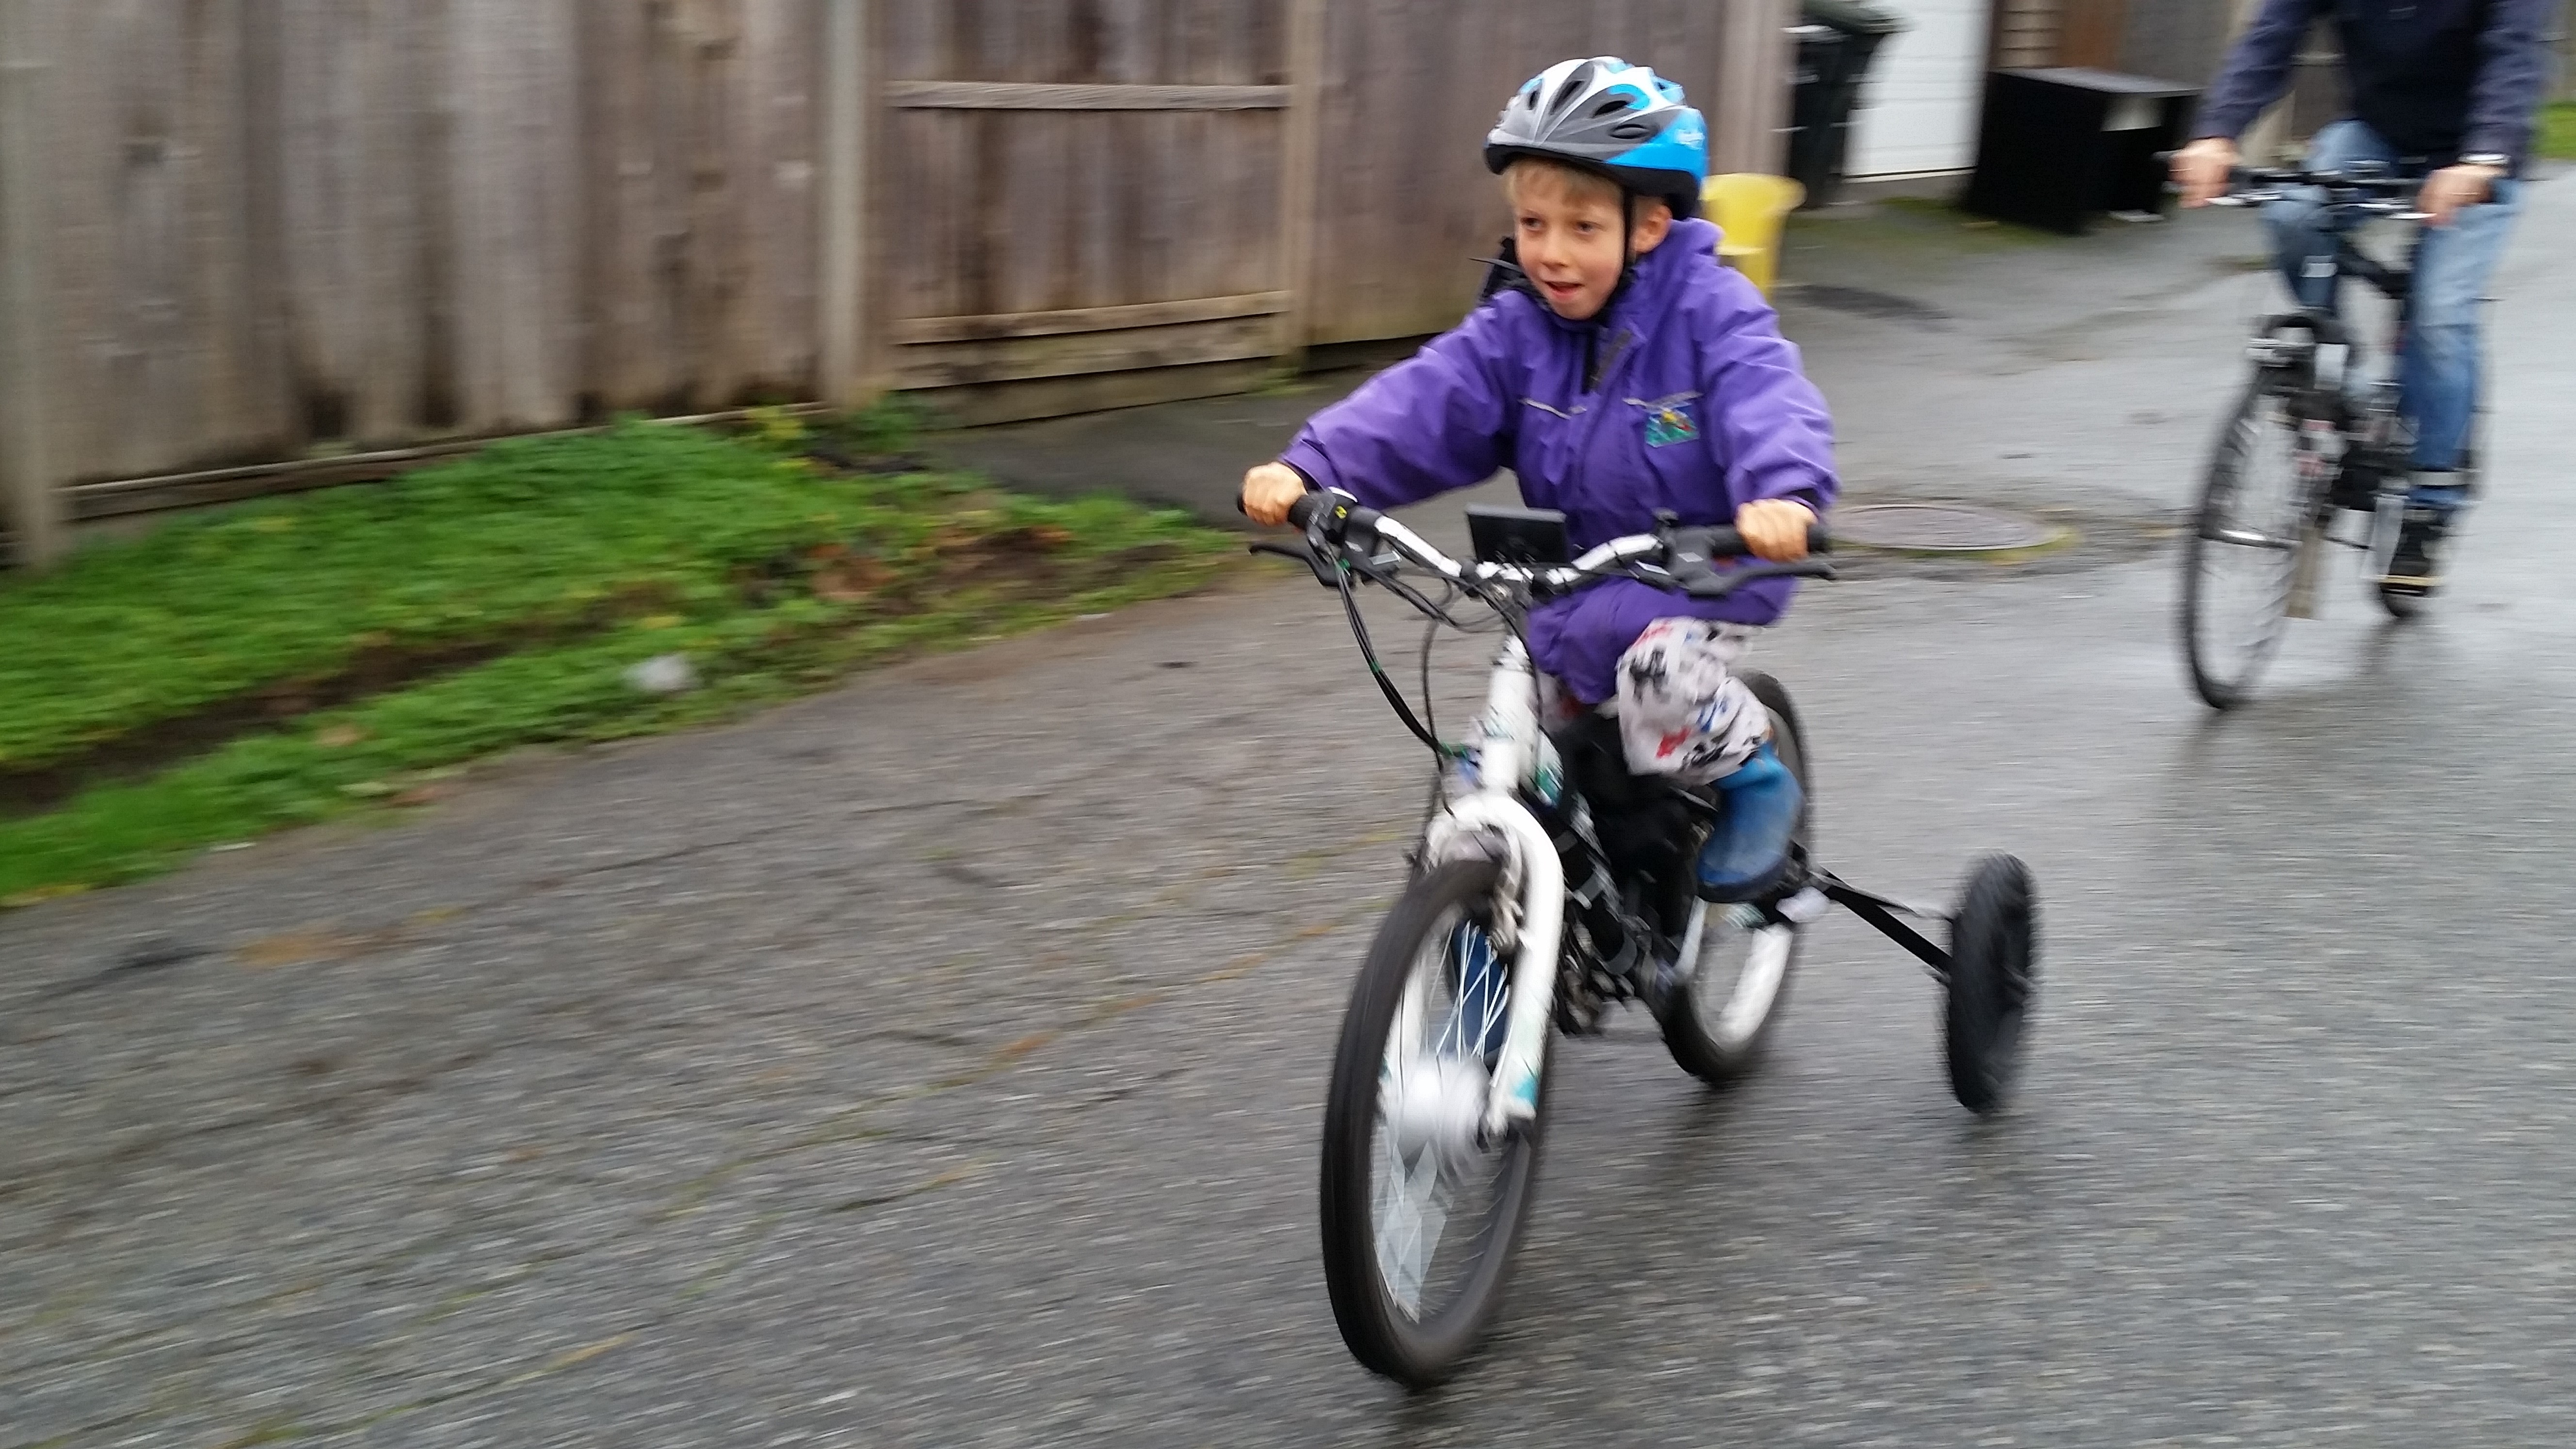
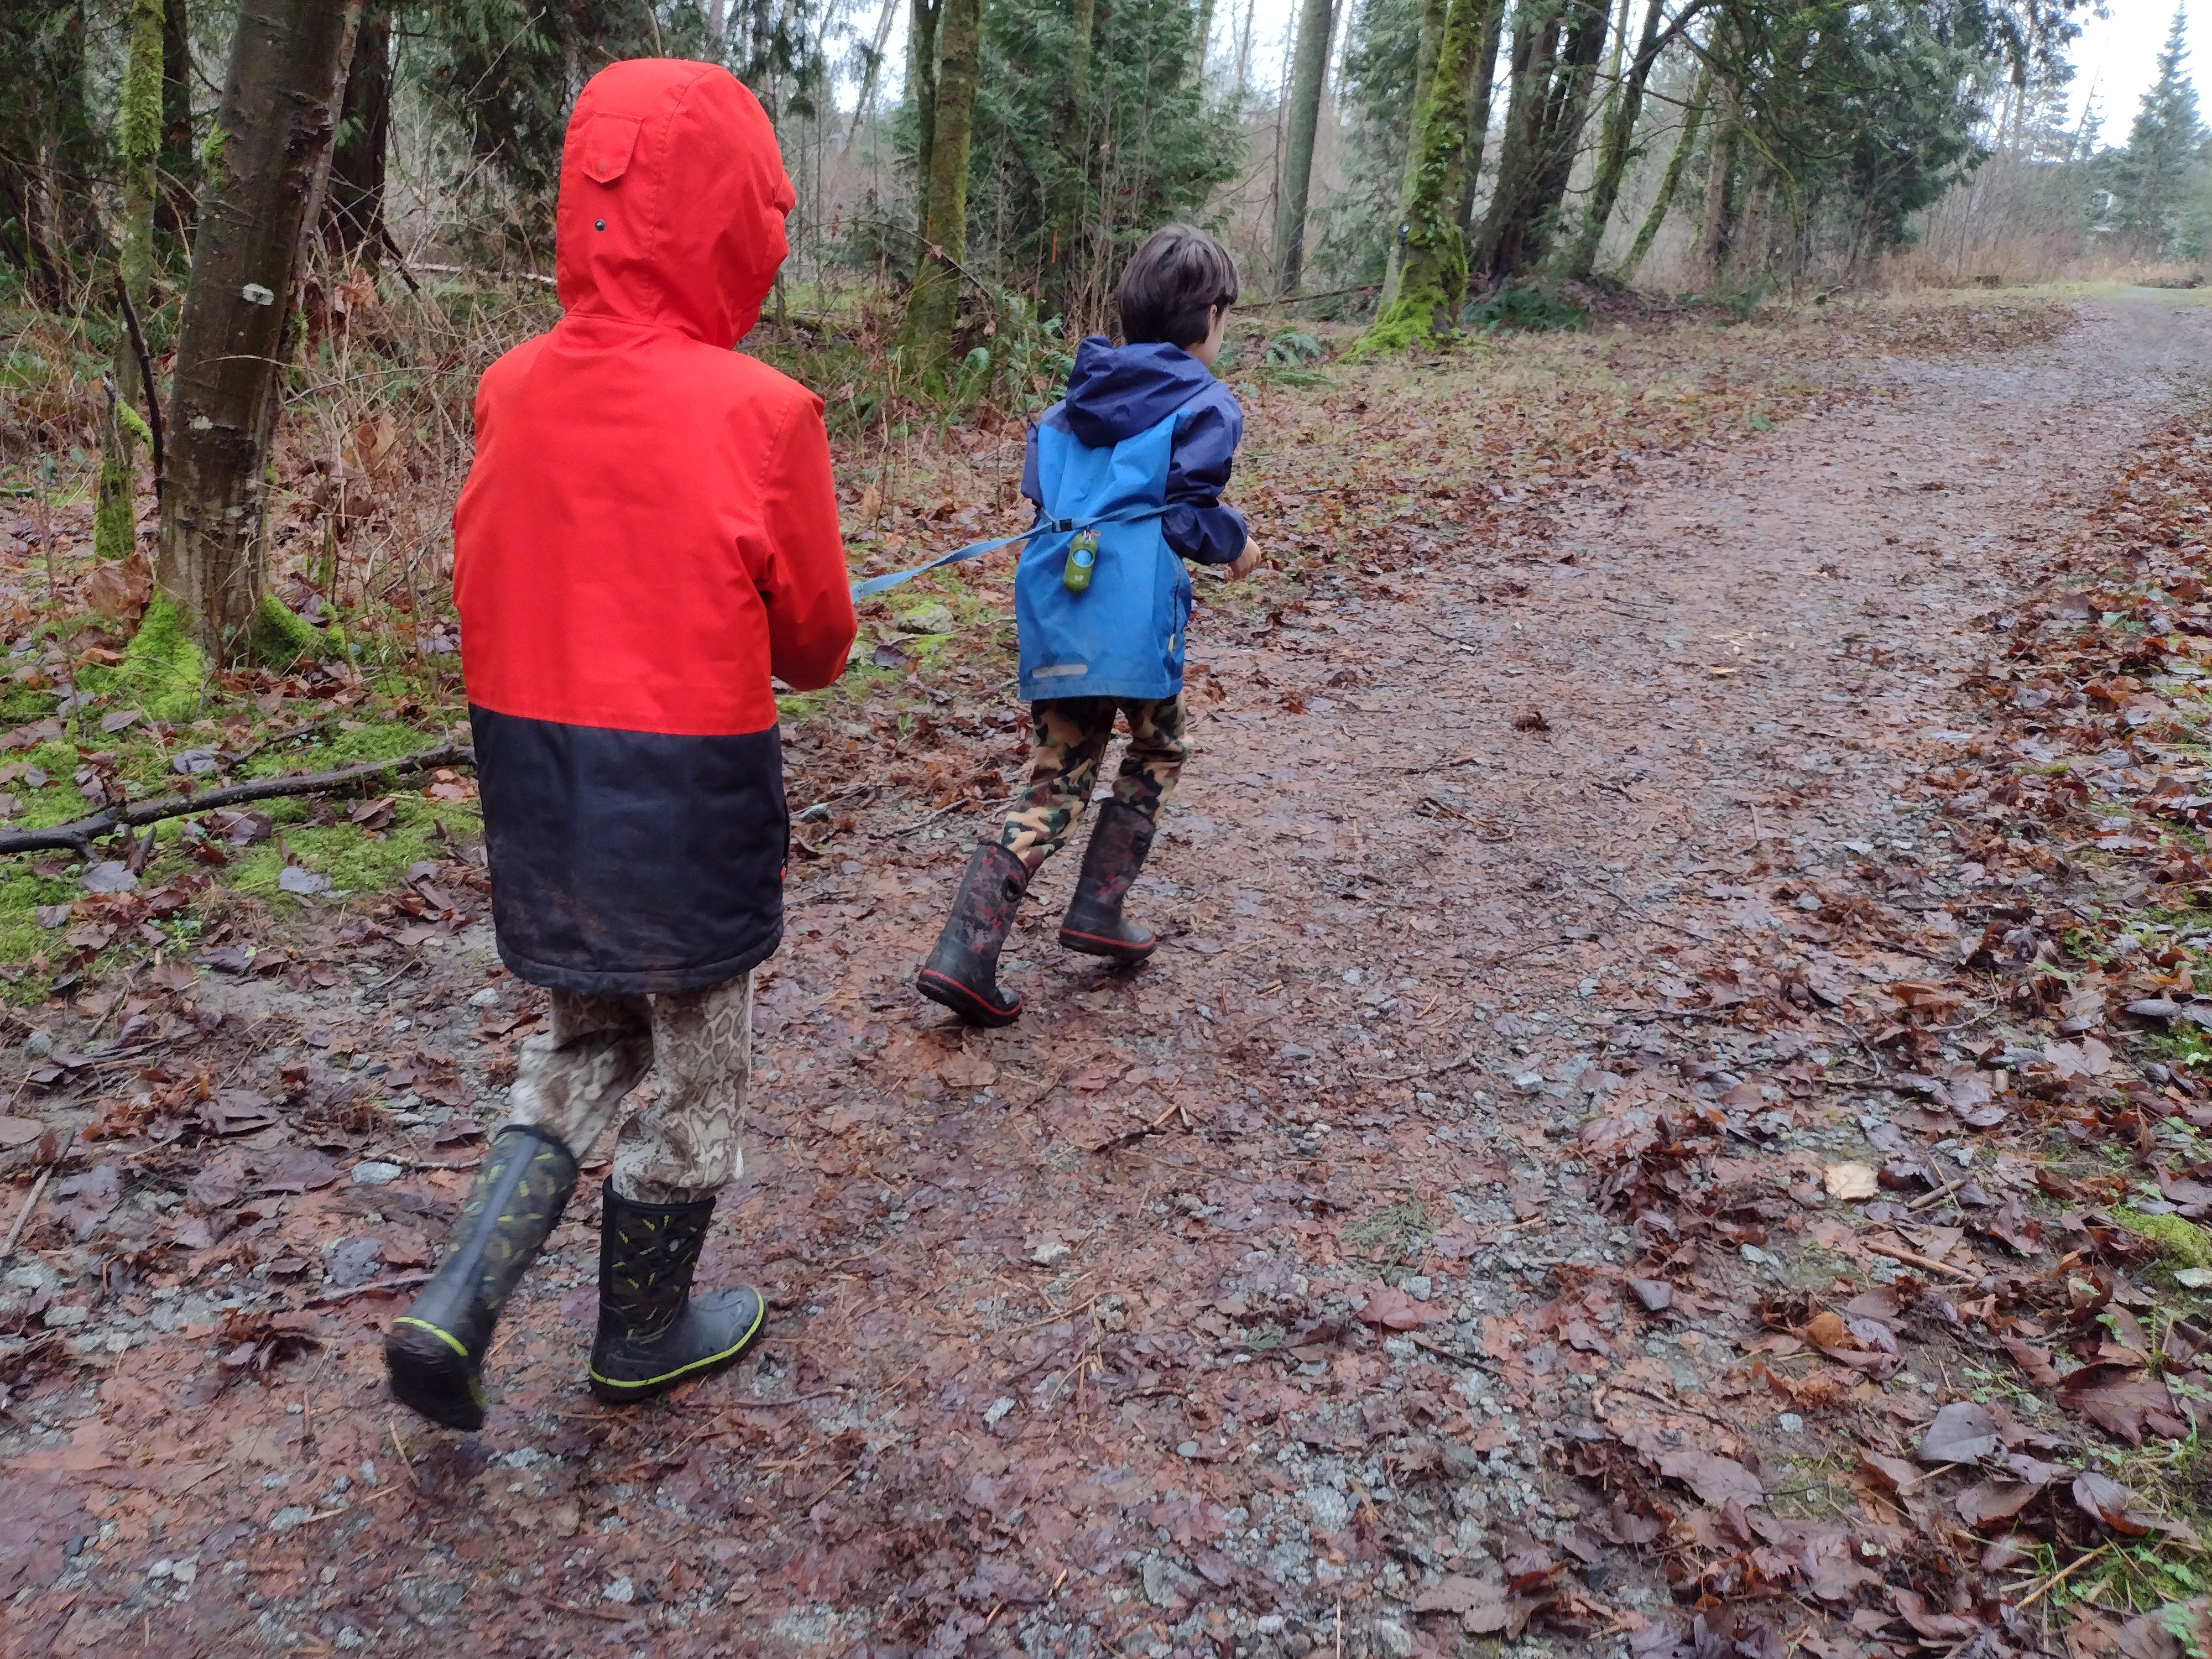
Getting Henry back on a bike and riding independently has been our biggest goal, and our biggest challenge over the past year.  But seeing the sheer joy on his face the first time he rode his bike… no doubt, I’d do it all again!

Look at him go!


Financial breakdown:

Henry’s bike: $40 (used off Craigslist)

Fat Wheels Adaptive Training Wheels: ~$200.00 (including shipping from the US)

Electric Bike Conversion Kit: ~$1500.00 (including all materials, time and installation)

I choose not to pursue funding for his bike, although I was told by several people I could.  Given that it is not actually an adaptive bike, it would be more challenging.  And funding typically must be approved before any purchases are made.  I wasn’t willing to wait. Frankly, I had enough set backs just getting the bike, that I didn’t want to go through the struggle of advocating for funding.

Cheers, Shelley

Leave a comment »

Henry’s Nutriport brand feeding tube

Henry has been using his Nutriport brand Skin Level G-Tube by Kangaroo for several months now, so it must be time to describe our experiences so far.  To sum it up… so far, so good!

We switched from the Mic Key to the Nutriport earlier this year as the Mic Key kept coming out – both with the balloon popped, and with it still inflated (ouch!).   So after lots of internet research, and a meeting with Christine – the g-tube nurse at BC Children’s Hospital, we made the switch.


A Quick Recap of Choices:

MicKey – the first choice in BC for most patients.  Seemed good at first, but Henry’s kept falling out.

Nutriport – very similar is shape and design as the MicKey.  The balloon has a slightly different shape.  Is also replaced every 3 months, at home, by the caregivers

BARD – a more “permanent” button, it is similar in shape but is only replaced once per year, typically in radiology and while the patient is under anesthetic (especially with younger patients).

AMT – according to blogs, it is well liked, but cannot be accessed in Canada as there is no Canadian supplier.  Apparently families would need to travel to the US to obtain on.


A Brief Description:

The nutriport is a skin level g-tube, meaning it is a low profile device that sits close to the skin.  It comes with both bolus and right angle extension tubes, although we primarily use the bolus one.  This button does sit slightly differently above the skin, and this is an unexpected benefit for Henry.  While the MicKey “under side” is flat on the side, the nutriport has two “feet” that raise it up ever so slightly above the skin.  This seems to result in better air flow around the stoma (the technical term for the hole into Henry’s tummy), and less irritation.  But beyond this, it functions pretty similarly to the Mickey.


A Few Photos:

Henry having breakfast :).  His pj’s typically cover up the button, so you can just see the tube coming out from underneath.

IMG_0916

A closer look at the button itself, with the extension tube attached.  We use the bolus extension tube (designed for “meals” versus the right angle tube designed for continuous feeding).

IMG_0915

Here’s another photo of just the button, with the flap open but no extension tube attached.  Those people familiar with tubes will note that it look very similar to most other skin level g-tubes.

IMG_0913

Here’s a photo of the two types of extension tubes.  Here’s where the nutriport and the Mickey differ.  We find the nutriport tubes to be far superior in terms of longevity and usability.  They are longer and wider (a drawback for someone who is volume sensitive), but make them much easier to use for homemade blended meals.

IMG_0923

A comparison of just the bolus tubes – which are typically the ones used with homemade foods – really shows how the nutriport’s are better for this purpose.  The Mickey’s bolus tube has a permanent angle, presumably to make it easier for self feeding.  But most blogs I read found this counterproductive, and personally we hated it.  In addition, the Mickey’s bolus tube has no port closures at the end.  Meaning that between syringes, even when clamped food would leak out.  The nutriport’s bolus tube has the same port closers as their right angle tube does.  Plus it is a flexible tube with no permanent angle, making it much more functional for both self feeding and care giver feeding. Overall, so much easier.

IMG_0924

Here are two photos of the button itself, first the nutriport and then a side-by-side of the nutriport and Mickey.  In the first photo, you can see the two small “feet” that raise it up ever so slightly.

IMG_0926

In this one you can see the difference in attaching the extension tubes.  The Mickey’s tube are the “click and turn to lock” style.  Meaning that once attached the extension cannot be removed until it is turned again.  Seems good for ensuring the tube doesn’t come out during feeding, but somehow with Henry’s wiggling, it would come off anyways.  And neither Granny (Shawn’s mom) or Grandma (my mom) got the hang of attaching the tube… blame it on their failing eyesight.

The nutriport is just a “push in” style.  There is no turning to lock required… just a solid push and it’s attached.  This took us a while to get used to, and you have to ensure you have a good grip on both the tube and the button to attach it, but now it’s no problem.  This also means that it can come out easier.  At first this seemed like a potential problem, but really it’s been a benefit.  It certainly doesn’t pull out easily, but in case it gets caught (like in a cupboard door), or pulled (like by a 10 month old younger brother) instead of pulling out the whole button or damaging the skin, the extension tube simply comes off.

IMG_0928

Here’s a side by side of the two different buttons with the balloon inflated – Mickey on the left and nutriport on the right.  You can see the slightly flatter top of the nutirport’s balloon.  We think the “egg” shape of the Mickey might be why it was falling out – literally being pulled through the hole.  The flatter top of the nutriport balloon hopefully keeps it in better.  Again… so far so good.

IMG_0962

Pro’s

  • It hasn’t fallen out!
  • extension tubes better suited for homemade blended food: wider tubing, ports that close on bolus tube and more flexible.
  • extension tubes stand up better to longer use.  The Mickey tubes would discolour and begin to permanently crimp after about a week, making it even harder to use a syringe.  The nutriport tubes clean easier, don’t discolour and don’t crimp.  We used one bolus tube for over 3 months, and with good cleaning it was still as good as ever.  I know, not recommended, but we couldn’t get any other bolus tubes at the time, so we had to make it work.
  • The “feet” raise the button up slightly, and this has reduced irritation and redness around Henry’s stoma.  He doesn’t have much trouble with it anyways, other than a bit of itchiness at times, but now it is even better.
    • he used to get some leakage from around the button. Not out of the button itself, but out of the stoma.  This was considered common and we typically had to change his shirt daily as it would be discoloured on the inside.  Now he has almost no leakage, which we attribute to the different shape of the balloon.


Cons:

  • It is less well-known, at least here is BC, which made getting supplies a bit of a challenge at first.  But a huge thank you to Christine from BCCH for helping get the tubes for us.
  • the extension tubes are considerably wider, and the right angle tube is a lot longer, than the Mickey.  Could be a drawback for a person who is very volume sensitive as it takes up to 30 ml of water to flush.
    • another drawback of the wider tubing is that chunks that would have been caught in the Mickey tubing, now get caught in the button itself.  We have less clogs overall (which is great!) but end up clearing the button more often than the tubing.
  • The buttons tend to leak fluid when open.  It isn’t typically a large amount (maybe 1 ml), but the Mickey rarely did that.  Our first button leaks a lot… like pooling on the floor a lot.  Christine from BCCH recommended changing it earlier than scheduled in case it was just an older button or defective.  We haven’t had that problem again since.
    • however the valve is more sensitive on the nutriport, so if even a small piece of food is caught in it, it will leak.  Typically it is easier to clear and this resolves any leakage.  Fine for us, but still not very nice.


Summary

Over all, we’re happy with the switch and would recommend it to others.  It is especially beneficial to those people wanting to have a homemade blended diet, and we find it makes a HUGE difference in this regard.  Plus… it hasn’t fall out!


As always, if you have any questions, please feel free to comment.


Cheers, Shelley

Leave a comment »

Arg…. “Chunky” food that needs to be strained :(

As you may recall, we’ve been having trouble with our blender lately.  It has been over heating and shutting off for no apparent reason.  As we await the new blender’s arrival, I’ve been challenged some days to get Henry’s food blended well enough.

The result: we’re straining every meal :(.

Of course… Henry thinks this is the best thing ever and is having a blast… so I suppose I should take his lead and enjoy :).


IMG_0919

In attempt to see all things positive, here’s a quick tutorial on straining “chunky” food:

First (and most importantly for us), let your 3 1/2 year sit on the kitchen counter.  This will make all subsequent steps much more fun!  We ended up warming up the food as usual (measuring into a 1 cup pyrex measuring up, adding a splash of water, microwaving for between 25-45 seconds depending on amount).  I found warmed food strained easier than food straight from the fridge.  Once it was warmed, we used a standard wire mesh strainer – the type that sits on top of a bowl is nice – and a mini whisk.   Just make sure the wholes are small enough to catch all the fibers or chunks.  We used a 4 cup measuring cup to sit the strainer on top because we could then syringe the food directly from there.

IMG_0917

Here’s a  photo of what we “caught” in the strainer… no wonder his button was clogging!  As far as I can tell, I think the orange chunks are peace skins.

IMG_0920IMG_0913Unfortunately, even with straining the food, Henry’s button still got clogged a few times.  I did the usual – tried “pulling” back on the syringe to unclog… tried flushing with water… tried pushing the food through.. but in the end it just didn’t work.

This next step is completely unauthorized, and every specialist, g-tube nurse and pediatrician you talk to would cringe when told.  However, when researching how to unclog buttons when the “standard” protocol doesn’t work… just about every blog described using a toothpick.  And you know what… it works!

Yes, you must be careful.  Inserting the toothpick too far in the button could damage the one way valve and permanently damage it.   I don’t think I could actually hurt Henry… it’s not like I’m going shove the entire toothpick through his button into his tummy.  I guess if I did, it might hurt him, but I think I’m smart enough not to do that.

What I did do was visually inspect his button and try to remove what I could with my finger and then a clean cloth.  Then I used a tooth pick to “sweep” around the inside of the button.  Not directly into the valve – at least not at first – but just around the inner edges of the button.  And I got a lot out.

IMG_0914

But it wasn’t enough and the button was still clogged.  So I gently rubbed against the valve with the toothpick and removed one chunk that looked like a small piece of quinoa.

and….

problem solved!

(only to be repeated about 100 more times over the next few days!)

One thing that I have noticed about the Nutriport button (versus the mic key) is that the inside of the button – the space between where the extension tube attaches and the valve, seems a bit larger.  It’s nothing noticeable from the outside, but there’s a bit more room in there for food to hang around in.  At first I thought this might be a problem, but I think it’s actually a bonus.  Instead of getting caught inside the actual valve, most of the chunks were just inside the button and fairly easy to remove.  If they had been pushed farther into the valve it may have been harder to unclog and might have been damaged in the process.


Another one of those “not very pretty” things that somehow just becomes “normal” pretty quick.

cheers, Shelley

Leave a comment »

Blender Breakdown… again!

Let me start off by saying that I love my Vitamix!!!!  And I really love Vitamix Customer Service!!!!

However… I love it less and less each time it breaks.  And this time… it was serious :(.

IMG_2541First… a little reminder…

We NEED this blender.  It’s not a toy or a fancy accessory… it’s how Henry eats.  No blender = no blenderized food.  No blenderized food and Henry can’t eat.  So we NEED this blender to work!

It’s broken down before,  but not this seriously.  The last time, customer service was able to send us new parts and we replaced them ourselves.  It never actually stopped working completely…

This time… it stopped completely!  I panicked…. SERIOUS panic!

We had been having trouble with it overheating and shutting off.  There is a built is auto shutoff, designed to ensure the motor doesn’t overheat.  A good thing in case someone is working it too hard, or using the wrong speed to blend something.  Simply wait a few minutes and it turns on again just fine.

However our machine was shutting off all the time.  And for no cause that I could determine.  I’d already contacted customer service and arranged a loaner so we could send ours in for repairs, so I was feeling confident.  Because we use the blender for “medical reasons” they will “sell” us a loaner machine for which they refund back all changes for once it is returned.  So yes, it costs a few hundred dollars, but it all works out in the end.

But the very next day, the machine quit and wouldn’t turn back on.  We always have some food frozen as a backup, but since parts are shipped from the US, it typically takes a week to get anything depending on how fast it goes through customs.  I didn’t have this much food.


So back on the phone with customer service…

In the end, I went to a local retailer that sells the Vitamix and purchased another one (another $600 on my Visa).  We used it for a week until our loaner arrived and then returned it.  I felt guilty, but it’s what customer service told me to do.  Apparently they allow all their retailers to accept returns with no questions asked.

A month later we got our original blender back with just about every thing replaced – at least that is what it looked like from the parts inventory included.

You’d think the story would be finished…. but no 😦

A couple of weeks later and the blender started turning off again.  I’d reduced the batch size… increased the liquid… and still it shut off.


So back on the phone with customer service…

This time… they are sending us a whole new blender! Yeah!  Since we never had any trouble with the two loaners… it must be something with our machine.

This is what I LOVE about Vitamix…

Every time I phone customer service they are FABULOUS!  I wish we didn’t have these troubles to begin with… but I am so pleased with how we have been treated.  And because we need it for medical reasons, they go out of their way to find solutions that will work.

THANK YOU VITAMIX!!!!!!!

🙂 🙂 🙂 🙂


(and cross your fingers our new blender is trouble-free!)


Cheers, Shelley

1 Comment »

New Boots!

Gotta love them boots!IMG_0901
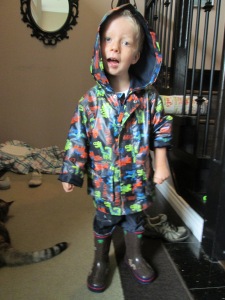
I actually debated A LOT about getting Henry boots.  He can’t wear his orthotics in them… which he really should be wearing as much as possible.  On the other hand… he needs something to wear outside in the rain.  It’s just not fair to tell a 3 1/2 year old that he can’t splash in the muddles for fear of getting his feet wet!  Last year we were forever trying to dry his orthotics and shoes out in front of the boiler.  In ended up that he was actually wearing them less… 30 minutes of fun outside meant wet foot wear for the rest of the day.

IMG_0902 So, I relented and we bought boots.  And they are cute :).

The compromise (in my own mind anyways!)… they will stay on the shelf in the coat closet and only be worn in heavy rain.  They will not become a daily occurrence (again… in my own mind!).

Cheers, Shelley

Leave a comment »

Henry’s New Orthotics

We visited our friend Eugene at Hodgsons Orthotics earlier this summer, as Henry had outgrown his last pair of orthotics and needed new ones.  Sometimes I can’t believe how fast his feet grow!  The design is very similar to his last pair, with three straps covering the area from his toes to just above his ankles.   Notice the cool fish pattern this time :).  Henry needs Supramaleolar Orthosis, or SMO’s to help support his feet and ankles.  These are the lowest type of orthotics… meaning they do not reach very high up his leg.

IMG_0908

IMG_0907

When wearing his orthotics, Henry typically takes a shoe size 1-2 sizes larger than what he would need otherwise.  And they have to be lace up… velcro or slip on just won’t go on over top.  He tends not to mind wearing them, and I think he knows that his feet need them.  In sock feet, his ankles sometimes turn and he falls more often.  Dr Reilly, our orthopedic surgeon, indicated that Henry will likely need some type of support for most of his childhood, especially during rapid growth spurts when his body is growing way too fast for his muscles to keep up.  On that note… we measured him this morning and he had grown over 2 inches in just under 4 months!

Here is a photo of what Henry’s feet look like when not wearing his orthotics:

IMG_0905

It’s a little hard to see, but his ankles turn in and he has very flat feet.  His left side is significantly worse, and he will actually drag his foot behind him when not in shoes.

But with the orthotics on, he walks with his feet almost parallel, and with much more control.

IMG_0910

We had some challenges this time around, with it taken significantly longer to get the orthotics.  The first set we received were of very poor quality, which didn’t make me happy.  But what I did very much appreciate was Eugene’s candid response that he was unwilling to give us an inferior product.  I didn’t even need to say anything – he beat me to it.  He remeasured Henry’s foot and ordered new ones that same day.

So… we waited longer, but in the end we got a new set of orthotics that will support Henry’s feet perfectly!

Cheers, Shelley

1 Comment »

Ice cube tray popsicles


Amina, our OT, has said many times that cold foods may help trigger a swallow.  Apparently the feeling of cold foods in your mouth can help signal to the brain that a swallow is needed.  So, to this avail, we decided to make popsicles!

IMG_0772


We love popsicles around here.  Just about any type of fruit juice will do.  To make them a bit more “kid friendly” I decided to make popsicles in ice cube trays.  Shawn had the suggestion to cover the container in plastic wrap and then use toothpicks as sticks.  By pulling the plastic wrap tight, the tooth picks can be “punched” through and the wrap holds them in place until frozen.

The sticks ended up a bit crooked, but not too bad.

However, after all this work… Shawn & Henry had popsicles for snack today and Shawn ended up with the small one and Henry the big one!

Oh well… such is life.

This was Henry’s first exposure to popsicles this year… he licked it a couple of times, touched it with his fingers, and watched it melt.  Complete success 🙂

Cheers, Shelley

Leave a comment »